Using Kong's [OpenID Connect](https://docs.konghq.com/hub/kong-inc/openid-connect)OpenID Connect (OIDC) plugin, Kong and [Okta](https://www.okta.com)Okta work together to solve three significant application development challenges:
- - Connectivity
- - [Authentication](https://konghq.com/blog/learning-center/api-gateway-authentication)Authentication
- - Authorization
The OIDC plugin enables Kong, as the [API gateway](https://konghq.com/blog/learning-center/what-is-an-api-gateway)API gateway, to communicate with Okta via the OAuth/OIDC flows. That way, your app teams don't have to configure and diagnose authentication and authorization for each service individually. With these challenges solved, app teams have more time to build and innovate.
This series will show you how to implement service authentication and authorization for [Kong Konnect](https://konghq.com/kong-konnect)Kong Konnect and Okta using the OIDC plugin. In this tutorial, we'll cover client credentials flow for application authentication. Parts 2-4 will cover:
- - Authorization code for user authentication
- - Integral introspection for token validation
- - Access control based on Okta’s groups and planes
## **Konnect and Okta Integration Topology**
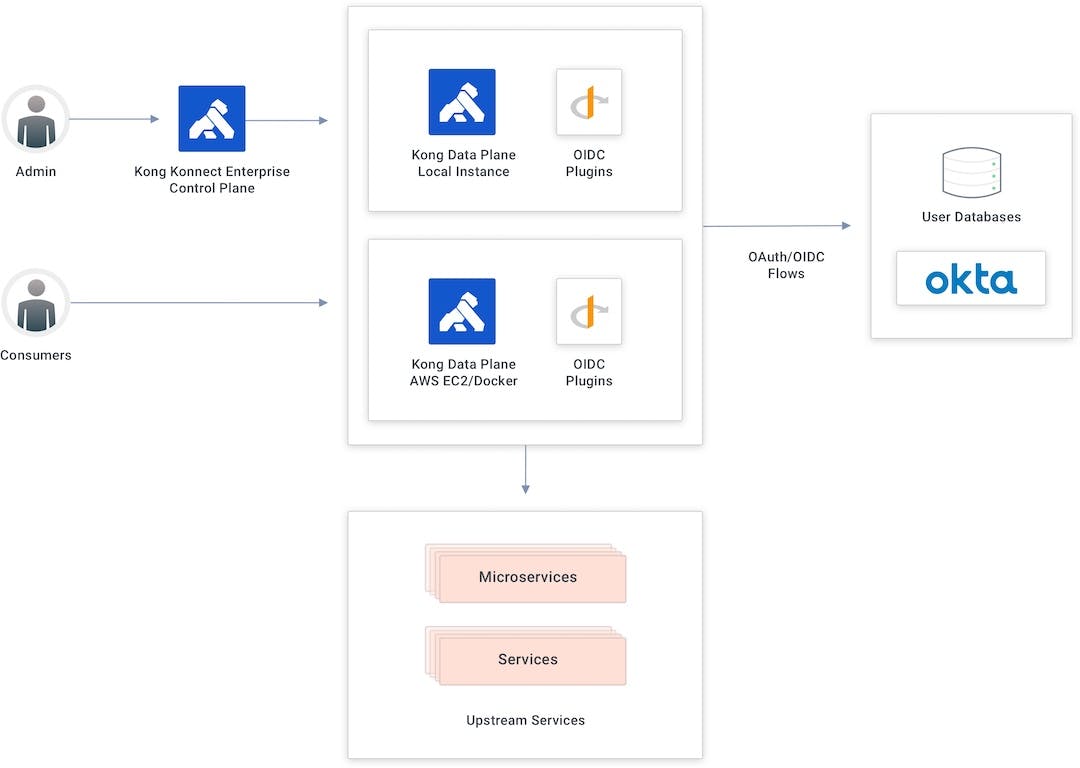
In the below diagram, the API gateway splits into two sublayers. The first is the control plane used by admins to create new APIs and policies. The second sublayer is accountable for request processing and API conception and contains the control plane responsible for publishing those APIs and policies to the data plane.
My topology has two data planes: the first running locally and the second running as a Docker container in an AWS EC2 instance. The integration is possible because Kong provides a specific plugin to implement the OAuth/OIDC flows from the API gateway. The OIDC plugin will submit the consumer to Okta’s authentication processes before consuming the API.
## **Set Up Konnect Service and Route**
Konnect is a cloud native service connectivity platform hosted as a service. It can take care of all connectivity use cases across any environment, including virtual machines (VMs) and [Kubernetes](https://konghq.com/blog/learning-center/what-is-kubernetes)Kubernetes.
Start by going to the ServiceHub in the Kong Konnect Enterprise Admin GUI. In my example, I've already set up a service. If you haven't already, follow the Kong Documentation to set up a service before continuing to the next steps.
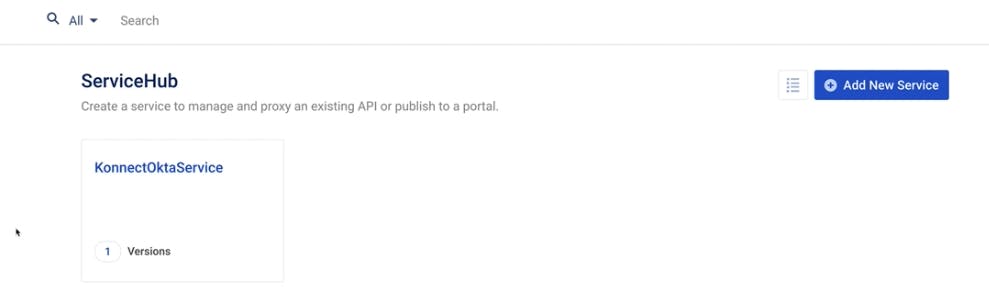
My service has only one version. We could define multiple versions with different definitions and policies if necessary.
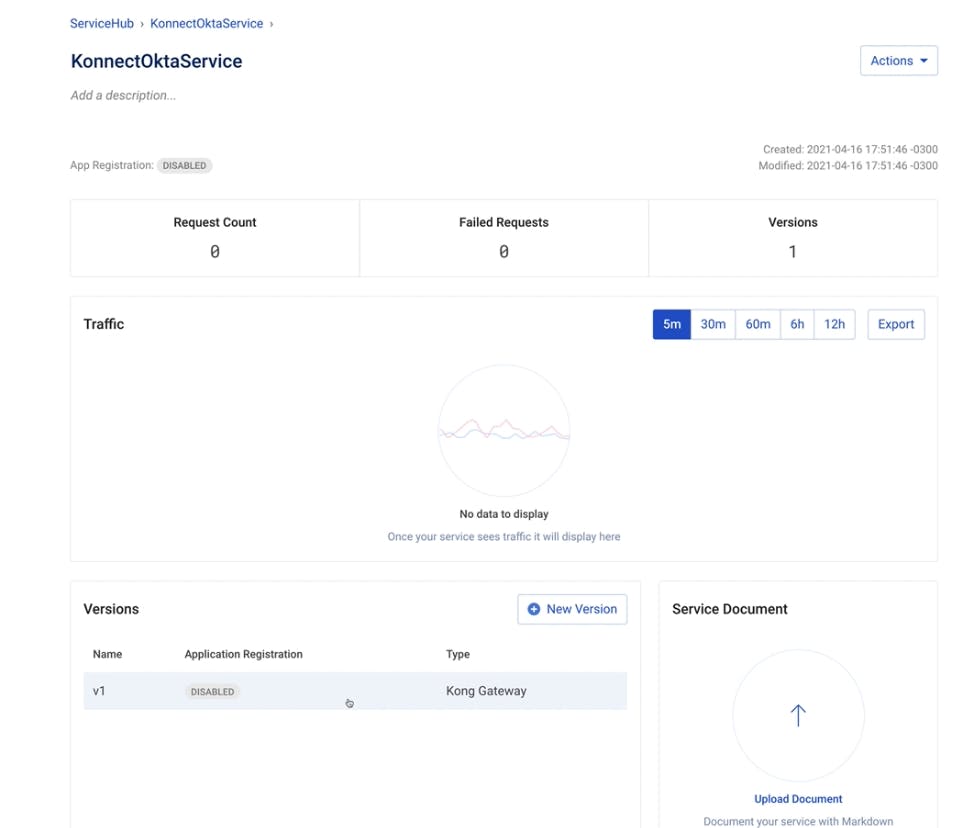
We could click on the service version to see the routes that are already exposing a service.
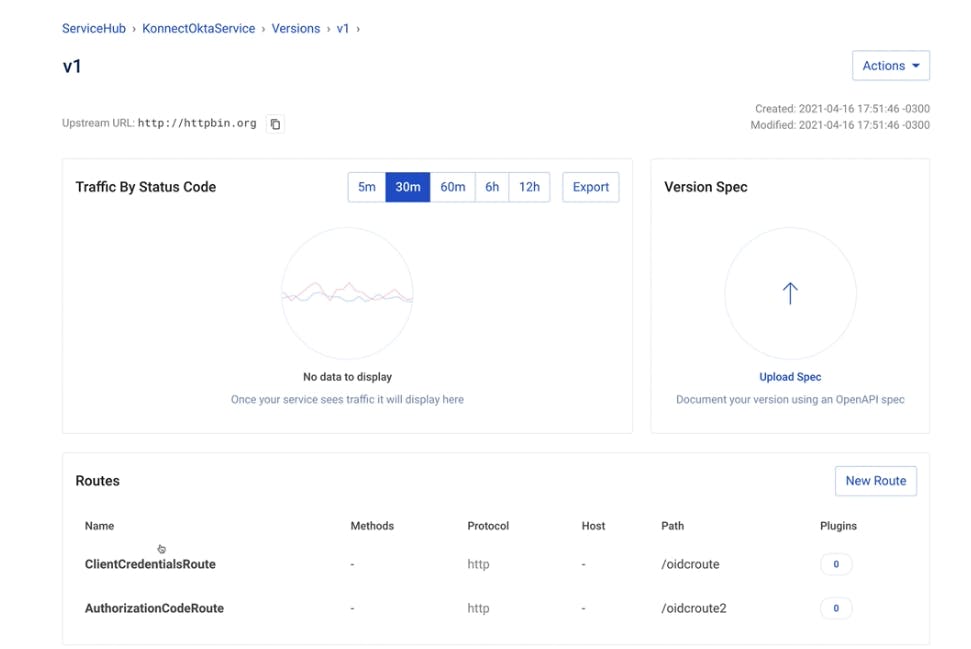
In my example, I'm going to consume and protect the /oidcroute. With no policy enabled, anyone can start consuming the route without any restriction. That's why it's critical to define and apply policies, like OIDC with Okta, to control this consumption.
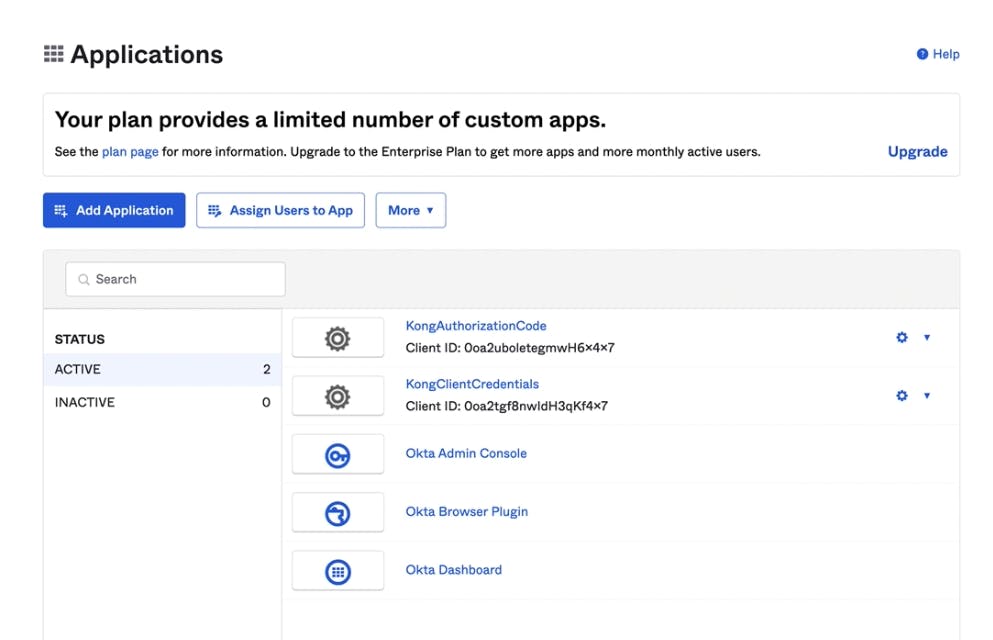
## **Set Up Okta**
My demo environment has two previously created Okta applications. In this example, I will use the Kong client credentials app.
## **Create Konnect Data Plane**
We'll run our Konnect data plane on an AWS EC2 instance in a Docker container. The control plane has a specific component called Runtime Manager. The Runtime Manager handles monitoring the currently installed data planes.
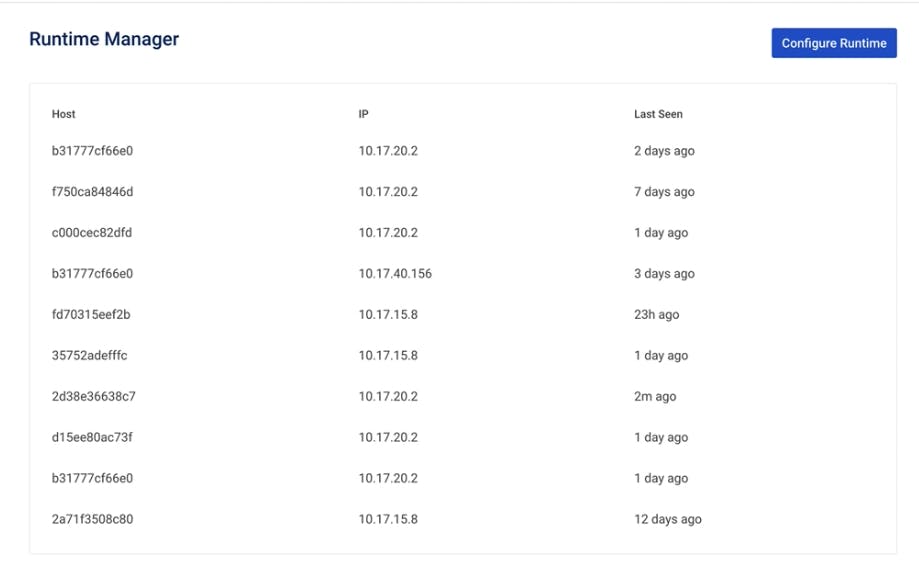
Click **Configure Runtime** to see the script we'll run to instantiate a Docker-based data plane.
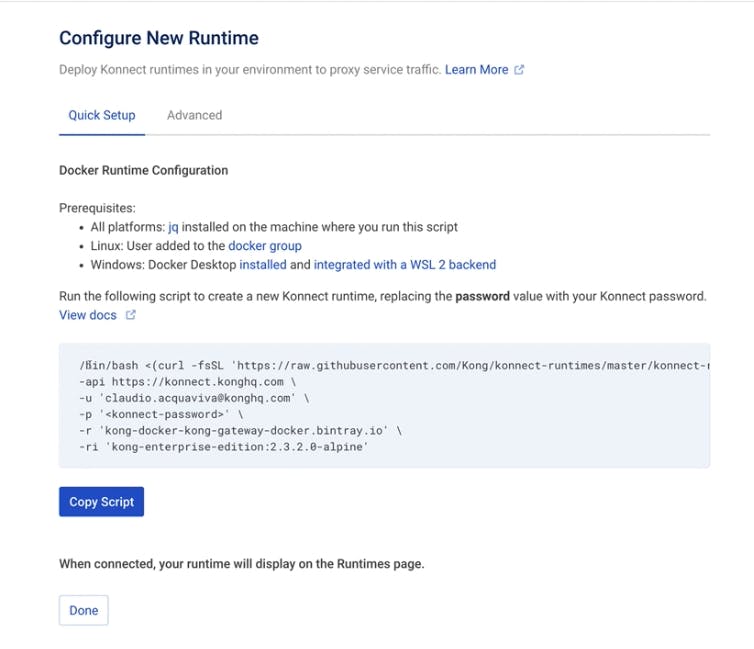
Run the script in the EC2 terminal to get our first data plane up and running. In my example, I have already updated the script to use my Kong Konnect credentials. It will pull from the Kong Docker image.
Ready to launch, enjoy the flight! I've now deployed the data plane, and all the APIs are already available to consume.

## **Consume the Route Without a Policy**
If we try to consume the route now by sending a request to http: 8000/oidcroute/get, we'll be able to consume the route as expected.
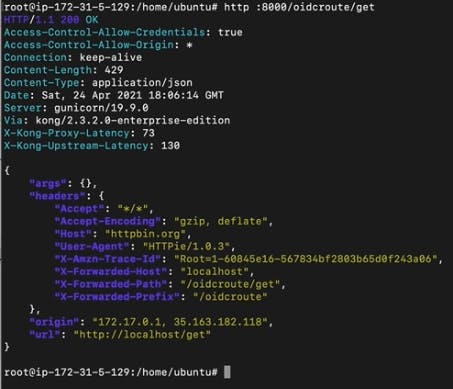
However, since we haven't set any policy to control the route consumption, anyone could send as many requests as they want. To solve this, we'll need to set up the OIDC policy to control the route consumption.
## **Add OpenID Connect Plugin**
To add the OIDC plugin, go to the ServiceHub > Service > Versions > Service Version > Add Plugin.
The plugin is expecting four parameters to integrate with Okta.
- -
- - **Config.ClientId**–issued from Okta
- - **Config.Client Secret**
- - **Config.Issuer**–Okta’s endpoint
- - **Config.Scopes**
After configuring those four settings, click **Create** to save our settings.
## **Test the OpenID Connect Plugin**
Let’s go back to our terminal and try to consume the route using http: 8000/oidcroute/get. The API gateway won’t allow us because we’re not providing the credentials.
If we try to send the same request, including our credentials (the client ID and client secret), we can consume the route.
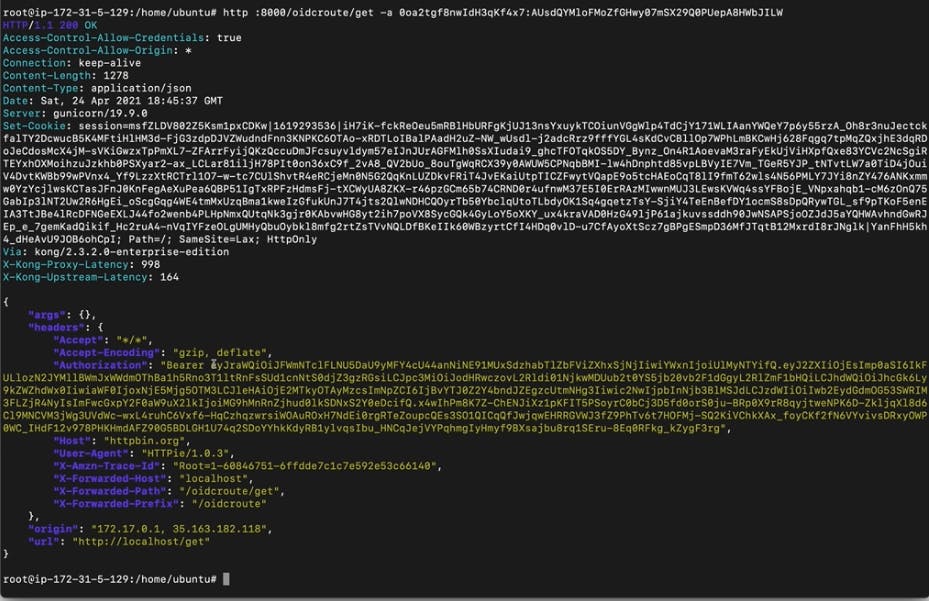
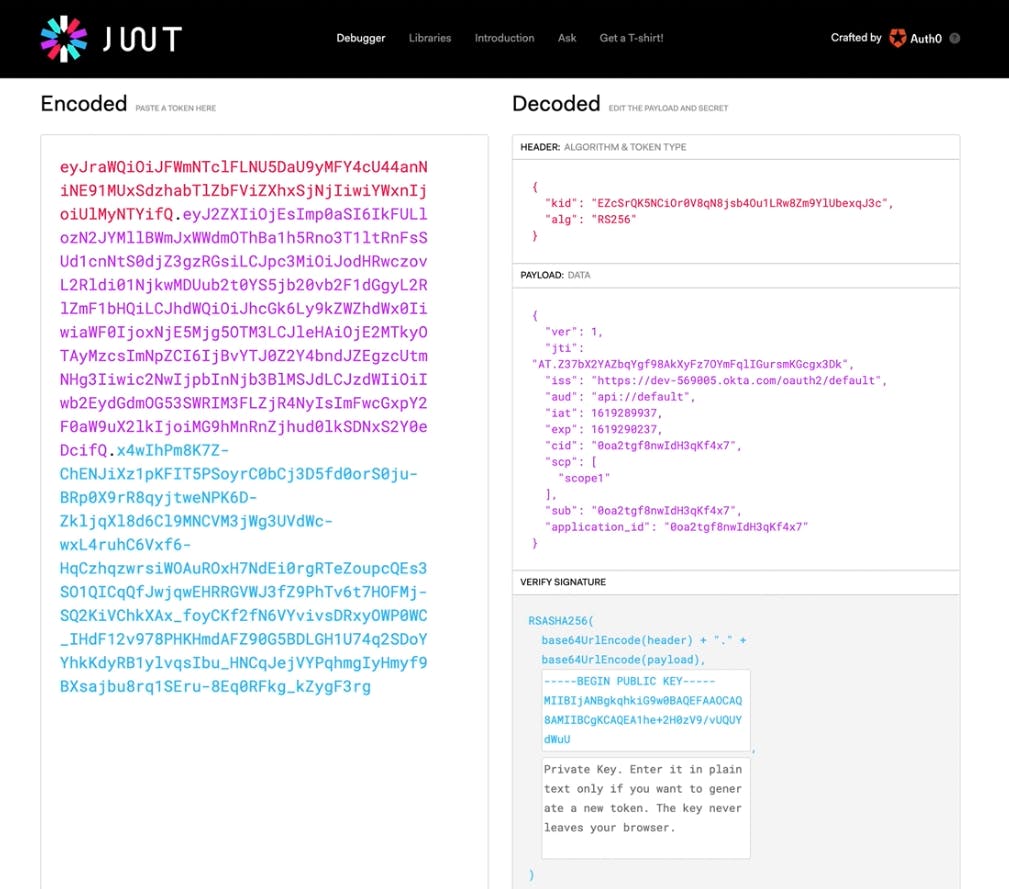
We can also decode the token issued by Okta on [jwt.io](https://jwt.io)jwt.io and check all the fields inside it.
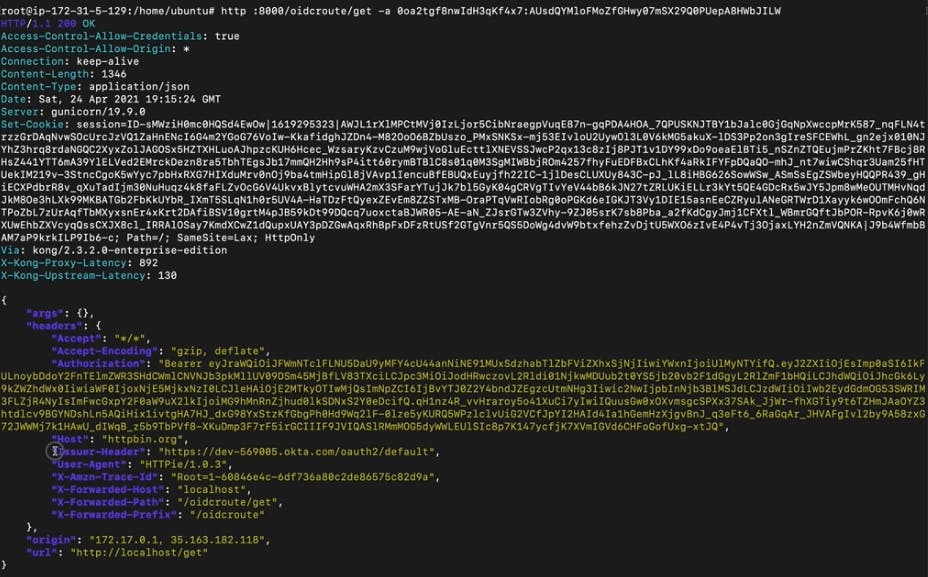
The OIDC plugin provides upstream header injection. That means we can extend requests with extra headers. Doing so sends the upstream or microservice more information about the authentication process. As an exercise, we can inject a header based on the ISS field, which is Okta’s issuer endpoint.
To set extra OIDC plugin parameters, use the Kong Konnect control plane to:
- - Edit the OIDC plugin and enter **iss** into the field: **Config.Upstream Headers Claims**.
- - Enter **Issuer_Header** in the field: **Config.Upstream Headers Names**.
- - Click Update.
Let’s consume the route one more time and inject a brand new header into our request.
## **Protect Your Applications with Kong Konnect and Okta**
[Start a free trial](https://konghq.com/kong-konnect)Start a free trial or [contact us](https://support.konghq.com/support/s/?_ga=2.220853277.461335063.1619442427-852472749.1605808164)contact us if you have any questions as you're getting set up.
Once you've set up Konnect and Okta, you may find these other tutorials helpful: