Two of the main tenets of Zero Trust are encryption between services and managing the connections each service is allowed to use. Achieving this generally falls to running a service mesh in a Kubernetes cluster. Refactoring applications to run properly in Kubernetes takes time and considerable investment. For many organizations, running their applications on virtual machines will be a necessity for years to come. However, this doesn't mean security should fall behind. Kong Mesh can be deployed to VMs to achieve Zero Trust for all applications, not only those running in Kubernetes.
In this blog tutorial, we'll explore setting up a global control plane using Kong Konnect, Kong’s unified SaaS API management platform. We'll configure a Postgres DB for the zone control plane and deploy the data planes that will manage the network traffic between the services. Running Kong Mesh outside of Kubernetes is referred to as Universal.
The graphic below shows the architecture for the environment we're building in this blog tutorial. The Zone Control Plane and Postgres exist on their own instance, as this is a best practice. The control plane may be installed on a shared instance with existing services when not using a transparent proxy. AWS is only used as an example and not required to follow the steps in this blog.
## Deploy and manage a global control plane using Konnect
The first step will be to deploy a global control plane that will be managed by Kong Konnect. Konnect will manage pushing the configuration to all the zone control planes deployed. This greatly simplifies the issue of having to manage control planes individually so focus can remain on strengthening the security of the network communication between services.
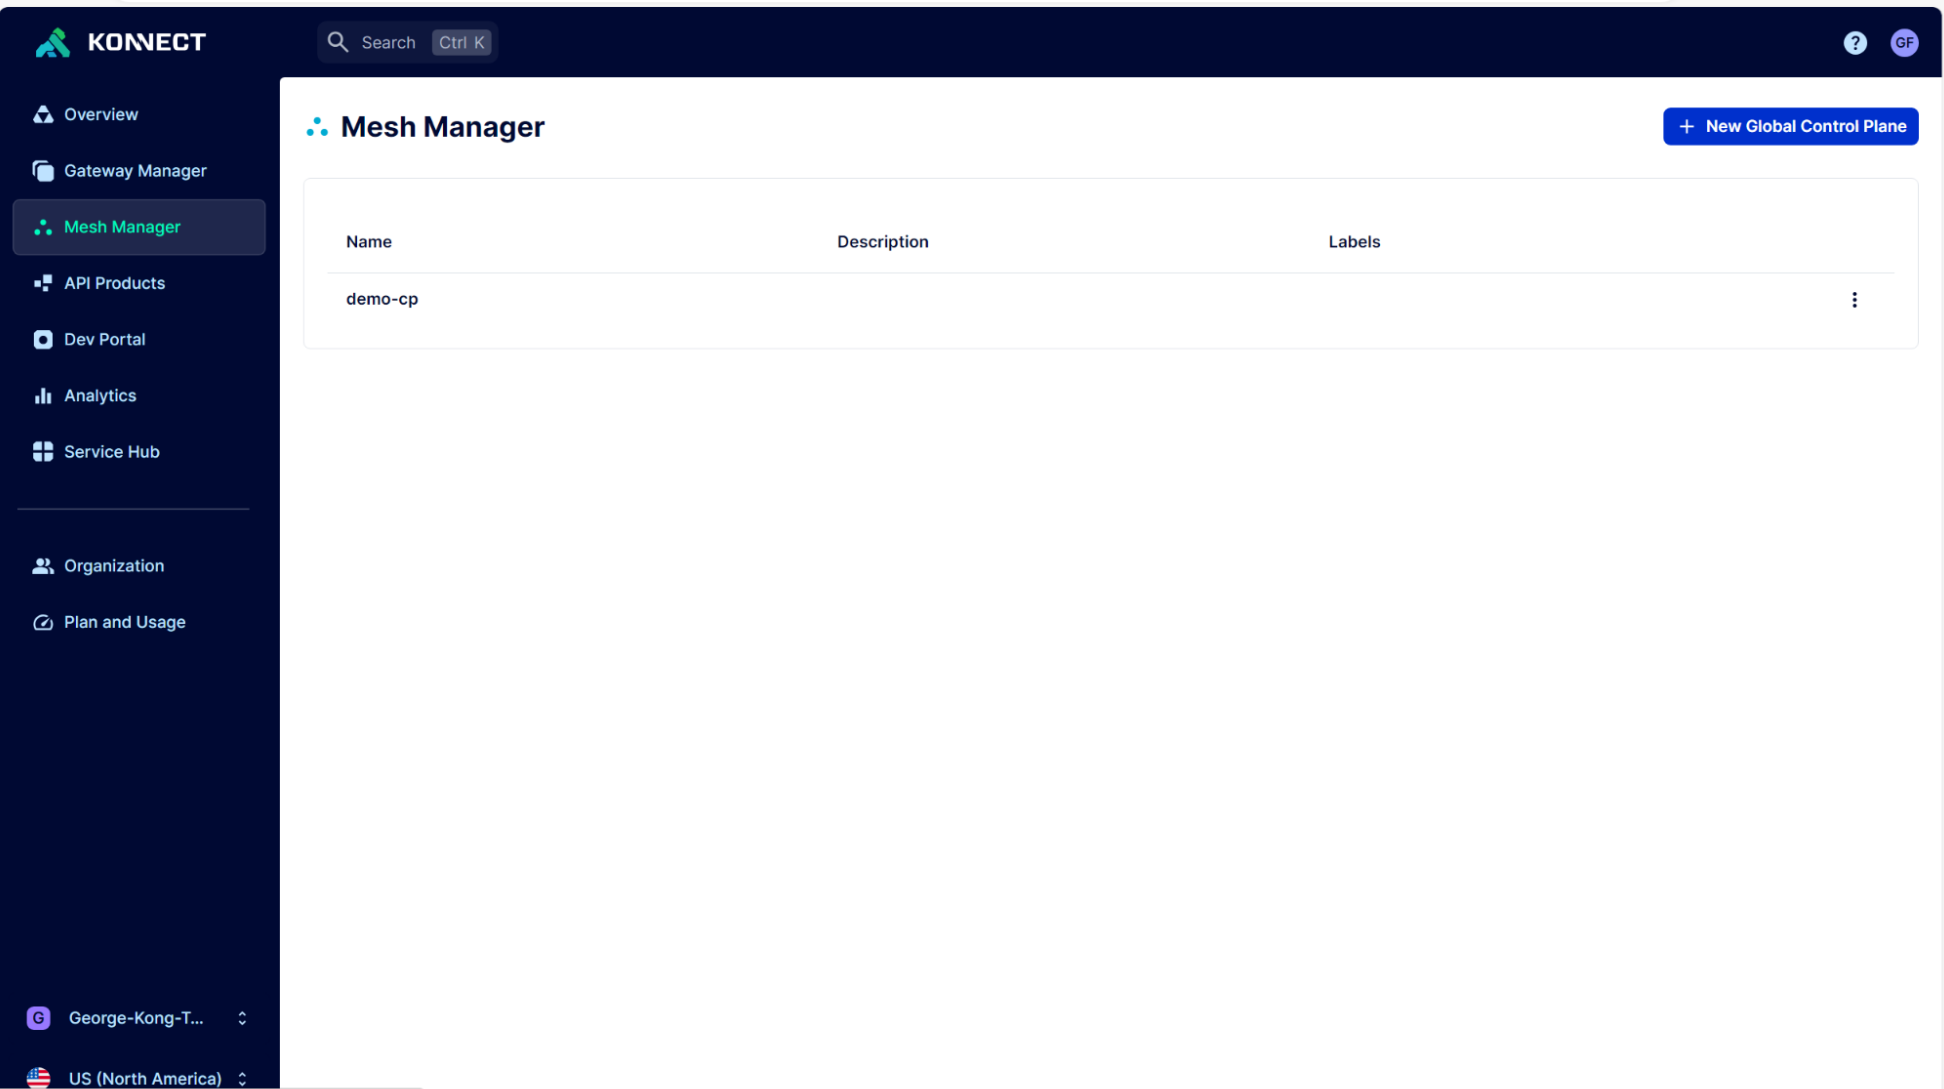
Log into Konnect and navigate to the **Mesh Manager **screen.
Select **New Global Control Plane** and provide a unique name and description and add a label (optional). When completed, you should have a new global control plane that has a default mesh already deployed. Meshes can span across zones and additional meshes can be created as needed.
## Using Postgres to persist state for our zone control plane
When deploying a zone control plane for use in Kong Mesh Universal mode, a database is used to persist state. A default in-memory deployment for zone control planes exists but should only be used for non-production environments. For the purpose of this tutorial, deploy Postgres as a Docker container or directly on your Linux platform following one of the two options below.
### Install and configure Postgres with Docker
Please confirm that Docker is installed on the environment used to follow this tutorial.
Starting Postgres will require a few environment variables to be set so Kong Mesh may successfully connect to the datastore.
Run the Postgres image with the following values: (Postgres should be downloaded automatically, if not, please use `Docker pull postgress`.)
Confirm the container is started and the specified environment variables are set.
### Install and configure Postgres on Linux
As a best practice, it's recommended that Postgres be installed on the local system with the zone control plane. Postgres may also be configured as a remote datastore and each zone control plane would have its own database. For remote access Postgres configuration, please refer to the [Postgres documentation](https://www.postgresql.org/docs/)Postgres documentation.
Install PostgreSQL This command may vary depending on your Linux platform. For RHEL, use `yum install postgresql` then run `postgresql-setup --initdb`.
sudo apt install postgresql
Start the PostgreSQL service.
sudo systemctl start postgresql
Enable PostgreSQL service.
sudo systemctl enable postgresql
Postgres will install as the user `postgres`. For this tutorial, we'll use the `–username` connection option when running `createdb` commands.
createdb kong --username=postgres
If the following error is given, a change will need to be made to the `pg_hba config` file.
createdb: error: connection to server on socket "/var/run/postgresql/.s.PGSQL.5432" failed: FATAL: Peer authentication failed for user "postgres"
Navigate to `/etc/postgresql/<version>/main` and open the `pg_hba config` file in an editor. For RHEL the configuration file will be in the `/var/lib/pgsql` directory.
/etc/postgresql/14/main$ sudo vi pg_hba.conf
Change the lines defining `peer` to `trust` and restart Postgres.
sudo systemctl restart postgresql
Run the `createdb` command again. The database should be created successfully.
Now let’s create a password using PSQL. First, we need to connect to Postgres with the username.
sudo -u postgres psql
Set a password for the Postgres user. Replace `<password>` with your chosen password.
ALTER USER postgres PASSWORD '<password>';
Quit out of PSQL.
\q
### Run the migrate task on the database for the zone control plane
Modifications to the values below should be considered depending on the method used to install Postgres. For a local Postgres installation, we specify the user as `postgres` and the password that was set via PSQL.
KUMA_STORE_TYPE=postgres KUMA_STORE_POSTGRES_HOST=localhost KUMA_STORE_POSTGRES_PORT=5432 KUMA_STORE_POSTGRES_USER=kong KUMA_STORE_POSTGRES_PASSWORD=kongpw KUMA_STORE_POSTGRES_DB_NAME=kong kuma-cp migrate up
A successful migration will complete with `DB has been migrated for Kuma`.
Once the migration task is run successfully, our Postgres database is ready for the zone control plane.
## Deploy a single zone control plane
Now that we have a global control plane managed by Konnect and Postgres deployed and configured on a local machine, we're ready to deploy a zone control plane. A single zone control plane is a great place to start and can be federated into a multi-zone deployment.
The limitations of a single zone control plane include:
- data plane proxies need to be able to communicate with other data plane proxies, e.g., peer network
- single zone deployment can't mix Universal and Kubernetes workloads
- deployment can connect to only one Kubernetes cluster at once
These limitations do not apply to multi-zone deployments.
We'll use Konnect to deploy our zone control plane and configure it to use our Postgres datastore.
In Konnect - Mesh Manager select **Global Control Plane** and then select **Create Zone**.
Follow the instructions via Konnect to save the token to a file and create the config.yaml.
We need to add the Postgres information to the kuma-cp command when running the deployment.
curl -L https://docs.konghq.com/mesh/installer.sh | sh - \
  && KMESH_MULTIZONE_ZONE_KDS_AUTH_CP_TOKEN_PATH=~/kuma-cp/cpTokenFile kong-mesh-*/bin/kuma-cp run --config-file config.yaml
The values should resemble the settings listed below. We’ll use the Postgres DB deployed in the previous step, make sure to update the hostname, port, and path to the `config.yaml`. Only run the curl command once. If you stop the zone control plane, restarting it with the Kuma variables is required to connect to Postgres.
Once completed, we should see the zone control plane showing online. Adding the ampersand allows the task to run in the background.
## Deploy Redis service to add to Kong Mesh
On a new server or the existing server running the Zone Control Plane (when transparent proxying isn't planned), we’ll install our services. For this tutorial, we’ll use Redis and WordPress. WordPress will connect to Redis to test our data plane configuration. For RHEL please use `yum install redis`.
sudo apt install redis
Once Redis is installed, confirm it's running.
sudo systemctl status redis
The status should show Redis as actively running on the server.
To test that Redis is functioning correctly, connect to the server using the command-line client.
redis-cli
Enter `ping` and Redis should return `pong`. Type exit to leave the command-line client.
Use the following command to verify where redis is bound. It should be `localhost:6379:`.
sudo netstat -lnp | grep redis
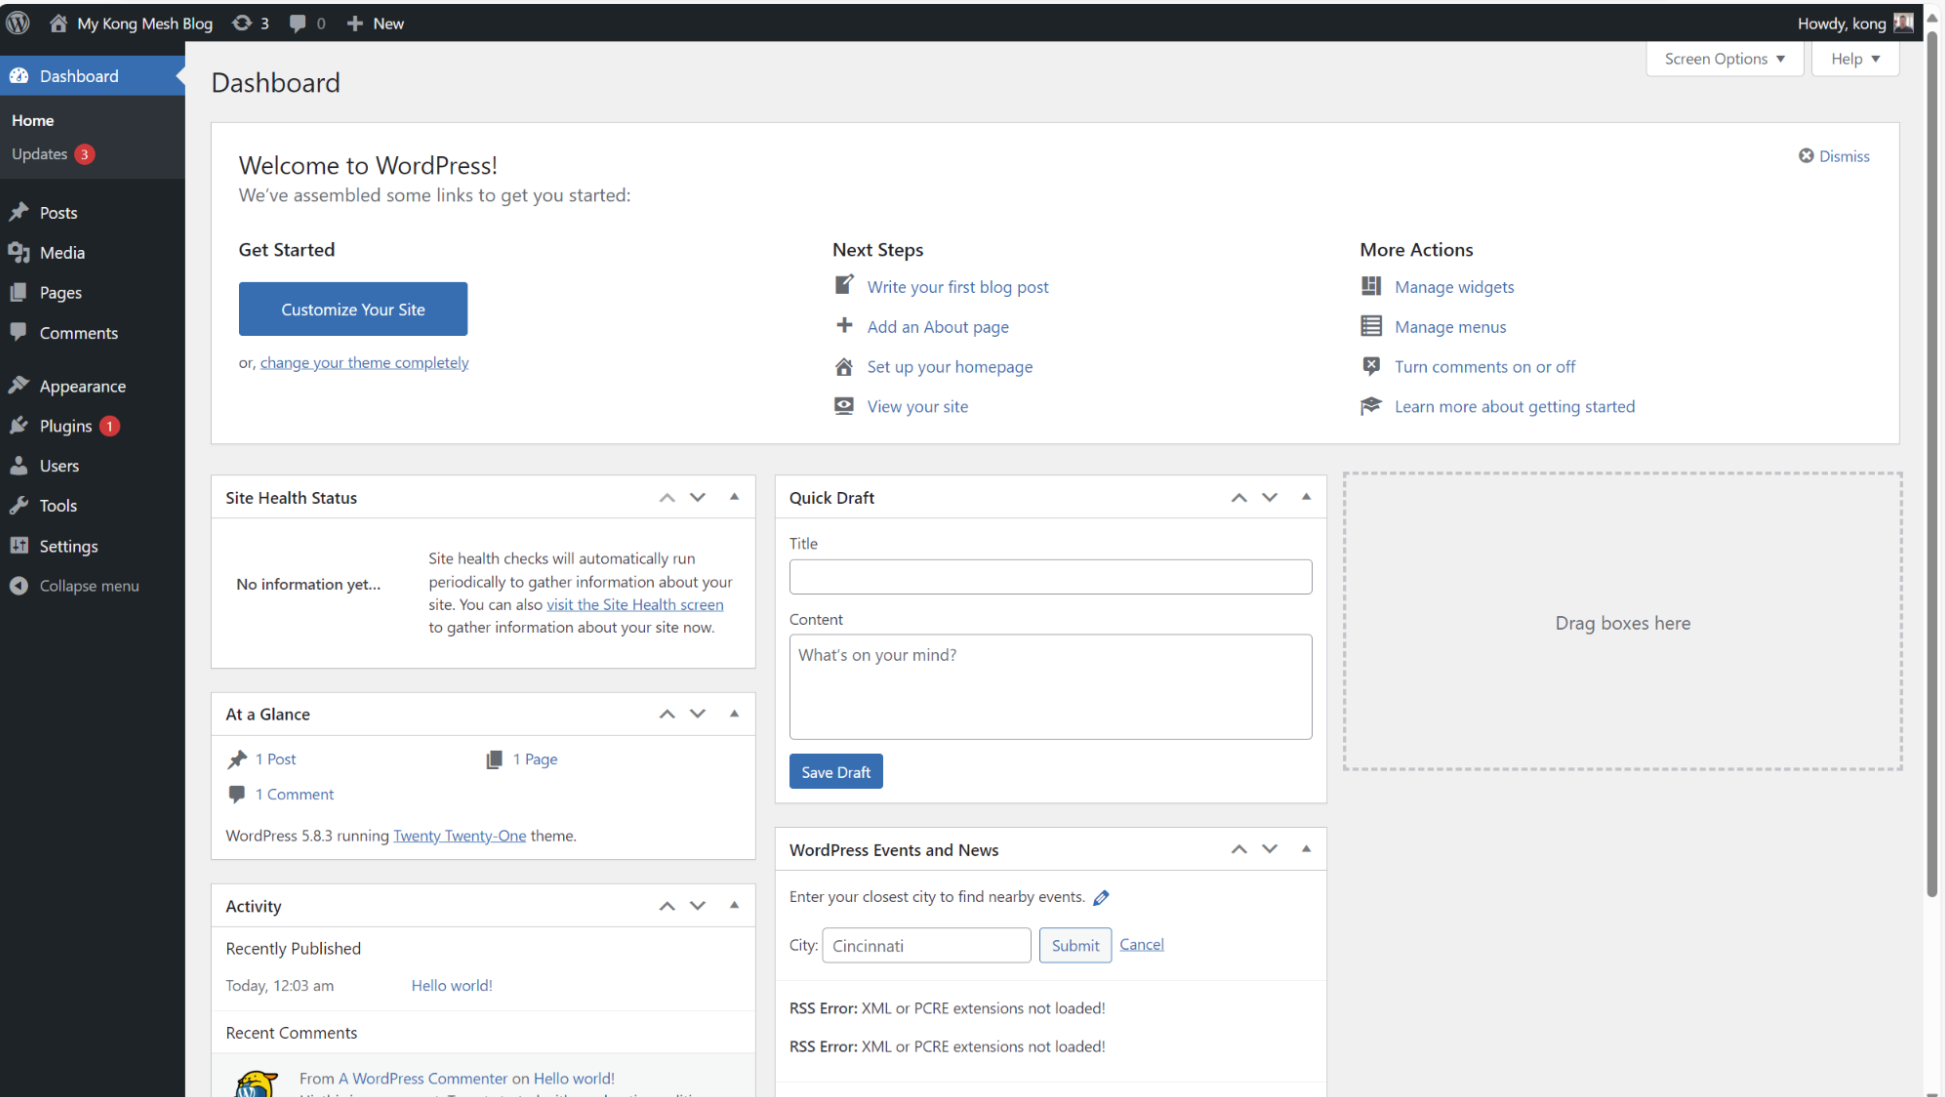
## Deploy WordPress to connect with Redis
We’ll use WordPress to connect to our Redis service and confirm we're communicating via the envoy proxy (our data plane proxy) that will manage the network traffic to Redis.
You may receive the following error if using a local environment.
Installation failed: Unable to locate WordPress content directory (wp-content).
Add the following line to config-localhost.php or wp-config.php.
define('FS_METHOD', 'direct');
If additional errors related to creating the directory exist, check your configuration file for the location of your wp-content directory. I have mine installed at the following.
Change the permissions for that directory so the plugin is allowed to write to it. Please do this only in a sandbox environment as 777 isn't suitable for production.
sudo chmod -R 777 wp-content/
Once installed, the plugin should show as ready to activate.
Active the plugin and confirm it is connecting to our local Redis installation.
## Configure transparent proxying
Configuring transparent proxying isn’t a requirement, however, it's recommended as a best practice because it retains the existing service naming and requires no changes to the application code.
Check the version of iptables, nf_tables are supported since 2.5.6. Iptables and iptables-nft should both function as commands on the server instance transparent proxying will be installed on.
iptables --version
Create a new user.
sudo useradd -u 5678 -U kuma-dp
Redirect all the relevant inbound, outbound, and DNS traffic to the Kong Mesh data plane proxy. Apply exceptions for anything running on the server that isn’t going to be given a data plane proxy. Services that make external calls that will be part of the mesh will use Kong Mesh policies to access those external services. I have included the outbound ports as an example.
(To get a list of open ports on the server, run: `sudo netstat -tulpn | grep LISTEN`.)
Transparent proxying is successful if the message below is received.
# iptables set to divert the traffic to Envoy
# Transparent proxy set up successfully, you can now run kuma-dp using transparent-proxy.
The changes won’t persist over restarts, add this command to your start scripts or use firewalld.
Currently, we can't use kumactl to uninstall transparent-proxy. (This may be included by the time this blog is published.) However, we can use the following `iptables cleanup` commands so `kumactl install transparent-proxy` may successfully be run again. This is useful if additional ports need to be added later.
On Universal, a data plane proxy must be explicitly configured with a unique security token that will be used to prove its identity. The data plane proxy token is a JWT token.
Create a token for our Redis service on the server where the zone control plane is installed and copy it over if Redis is running on a different server.
Save the definition as a yaml file (e.g. dp.yaml). With our token file for Redis and data plane definition saved, we can pass these to the kuma-dp run command.
Update the zone control plane address as needed. If an error is received please view the troubleshooting section below.
kuma-dp run --cp-address=https://127.0.0.1:5678 --dataplane-file=dp.yml --dataplane-token-file=kuma-dp-redis-token
Konnect should now show that the data plane proxy is online and exists for our Redis service.
Now we may either curl the Redis endpoint or access a page from the WordPress application. Viewing the data plane proxy page on Konnect, we should see a connection count for inbounds. All traffic going to Redis will be handled by the data plane proxy.
### Troubleshooting: The data plane fails with an Envoy error
If the data plane fails on an Envoy error, on RHEL 8 and some older distributions of Linux the following message may be received when executing `envoy --version.`
envoy: /lib64/libm.so.6: version `GLIBC_2.29' not found (required by envoy)
envoy: /lib64/libpthread.so.0: version `GLIBC_2.30' not found (required by envoy)
`ldd --version` will return an older version of the required file:
## Redis is now our first member of the Kong Service Mesh
Congratulations! We've successfully created a global control plane in Konnect, created a zone control plane, and deployed our first data plane proxy to handle all traffic for Redis. The data plane proxy sitting in front of Redis is commonly referred to as a sidecar in Kubernetes or mesh proxy, and we can use that terminology here as well. Deploying additional mesh proxies in front of other services on the same server or additional servers is what makes up the service mesh and provides resiliency, observability, and security for all the services that represent an application.
From here we can configure traffic policies to ensure only services that should connect to each other are allowed to. Enabling mTLS (not enabled by default) will provide encryption between all the services in the mesh. Those two combined are key tenets of Zero Trust.
Kong’s Universal Mesh is a feature-rich service mesh. Please see the links below to continue your journey and learn about additional configuration options.
## Create a token and data plane definition for WordPress (optional)
In the beginning of our blog, the architecture diagram shows a data plane proxy for both Redis and WordPress. While we've proven the ability to direct traffic reaching our Redis service through a data plane proxy, we can take this a step further and apply a data plane proxy to our WordPress service as well. This will enable the ability to have mTLS between our services. This would resemble a production configuration and is an optional additional step in this tutorial.
Create a token for WordPress on the zone control plane server.
Save the definition as a yaml file (e.g. dp2.yaml). With our token file for WordPress and data plane definition saved, we can pass these to the `kuma-dp run` command. This command should be run on the server running WordPress.
kuma-dp run --cp-address=https://127.0.0.1:5678 --dataplane-file=dp2.yml --dataplane-token-file=kuma-dp-wordpress-token
WordPress will now be part of the mesh along with Redis. Enabling mTLS will encrypt all of the application network traffic between them.
## Conclusion
While utilizing a service mesh in a Kubernetes environment has become more commonplace in recent years, we shouldn’t overlook security for applications running on VMs. Many organizations own a vast number of services in the cloud or on-premises that aren't part of a Kubernetes cluster and realistically, will not be refactored to do so in the near future.
Kong Mesh 2.14 also introduces improvements to the mesh-scoped zone proxy deployment model. This makes it easier to configure and operate zone proxies for specific meshes, including Helm support for mesh zone proxy configuration. For customers runni
Justin Davies
# Kong Mesh 2.13: Mesh Identity Support for Universal Mode & LTS
Kong Mesh 2.13 delivers full support for Mesh Identity for Kubernetes and Universal mode. Plus, it's been designated as a Long Term Support release, with support for a total of 2 years. But first, what's Kong Mesh for the uninitiated? Built on top
Justin Davies
# Kong Identity Principals: One Record to Govern Every API, Event, and Application Identity
Modern enterprise APIs don't live in one place. They're spread across multiple gateways, deployed across regions and clouds, and accessed by a growing mix of consumers, internal developers, external partners, machine-to-machine services, and increas
Amit Shah
# 10 Ways Microservices Create New Security Challenges
Why are Microservices Security Risks?
Traditional security was simple. One perimeter. Few entry points. Clear boundaries.
Microservices shattered this model. Now organizations manage hundreds of independent services. The average number of API calls
Mike Bilodeau
# Mesh to the Rescue of API Gateways for Cross-Cloud Connectivity
Many organizations struggle with managing API gateways across multiple cloud environments. In this blog post, we'll explore how Kong Mesh can solve these challenges and enable seamless cross-cloud connectivity. The challenge of multi-cloud API gatew
Deploying Kong Mesh on ECS The focus of this blog is to provide step-by-step instructions for deploying and configuring Kong Mesh with Kong Konnect on an AWS ECS instance so that anyone will be able to get pre-production installation of Kong Mesh st
Vince Russo
# Adopt a Zero Trust Approach with OAuth 2.0 Mutual TLS Client Authentication
In the modern IT stack, API gateways act as the first line of defense against attacks on backend services by enforcing authentication/authorization policies and validating and transforming requests. When backend services are protected with a token-b
Samuele Illuminati
# Kong Mesh 2.14: Finer Zone Proxy Control and Tighter Security
Kong Mesh 2.14 also introduces improvements to the mesh-scoped zone proxy deployment model. This makes it easier to configure and operate zone proxies for specific meshes, including Helm support for mesh zone proxy configuration. For customers runni
Justin Davies
# Kong Mesh 2.13: Mesh Identity Support for Universal Mode & LTS
Kong Mesh 2.13 delivers full support for Mesh Identity for Kubernetes and Universal mode. Plus, it's been designated as a Long Term Support release, with support for a total of 2 years. But first, what's Kong Mesh for the uninitiated? Built on top
Justin Davies
# Kong Identity Principals: One Record to Govern Every API, Event, and Application Identity
Modern enterprise APIs don't live in one place. They're spread across multiple gateways, deployed across regions and clouds, and accessed by a growing mix of consumers, internal developers, external partners, machine-to-machine services, and increas
Amit Shah
# 10 Ways Microservices Create New Security Challenges
Why are Microservices Security Risks?
Traditional security was simple. One perimeter. Few entry points. Clear boundaries.
Microservices shattered this model. Now organizations manage hundreds of independent services. The average number of API calls
Mike Bilodeau
# Mesh to the Rescue of API Gateways for Cross-Cloud Connectivity
Many organizations struggle with managing API gateways across multiple cloud environments. In this blog post, we'll explore how Kong Mesh can solve these challenges and enable seamless cross-cloud connectivity. The challenge of multi-cloud API gatew
Deploying Kong Mesh on ECS The focus of this blog is to provide step-by-step instructions for deploying and configuring Kong Mesh with Kong Konnect on an AWS ECS instance so that anyone will be able to get pre-production installation of Kong Mesh st
Vince Russo
# Adopt a Zero Trust Approach with OAuth 2.0 Mutual TLS Client Authentication
In the modern IT stack, API gateways act as the first line of defense against attacks on backend services by enforcing authentication/authorization policies and validating and transforming requests. When backend services are protected with a token-b
Samuele Illuminati
## Ready to see Kong in action?
Get a personalized walkthrough of Kong's platform tailored to your architecture, use cases, and scale requirements.