Installing Kuma on Kubernetes is fairly straightforward, thanks to the `kumactl install [..]` function. You can use it to install the control-plane with one click:
$ kumactl install control-plane | kubectl apply -f -
namespace/kuma-system created
secret/kuma-sds-tls-cert created
secret/kuma-admission-server-tls-cert created
…
$ kubectl apply -f https://bit.ly/demokumakongcustomresourcedefinition.apiextensions.k8s.io/kongconsumers.configuration.konghq.com created
customresourcedefinition.apiextensions.k8s.io/kongcredentials.configuration.konghq.com created
customresourcedefinition.apiextensions.k8s.io/kongingresses.configuration.konghq.com created
customresourcedefinition.apiextensions.k8s.io/kongplugins.configuration.konghq.com created
serviceaccount/kong-serviceaccount created
clusterrole.rbac.authorization.k8s.io/kong-ingress-clusterrole created
clusterrolebinding.rbac.authorization.k8s.io/kong-ingress-clusterrole-nisa-binding created
configmap/kong-server-blocks created
service/kong-proxy created
service/kong-validation-webhook created
deployment.apps/ingress-kong created
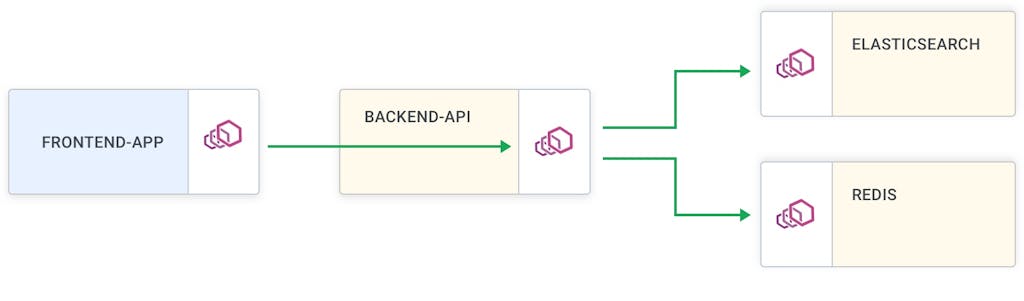
By default, the ingress controller distributes traffic amongst all the pods of a Kubernetes service by forwarding the requests directly to pod IP addresses. One can choose the load-balancing strategy to use by specifying a KongIngress resource.
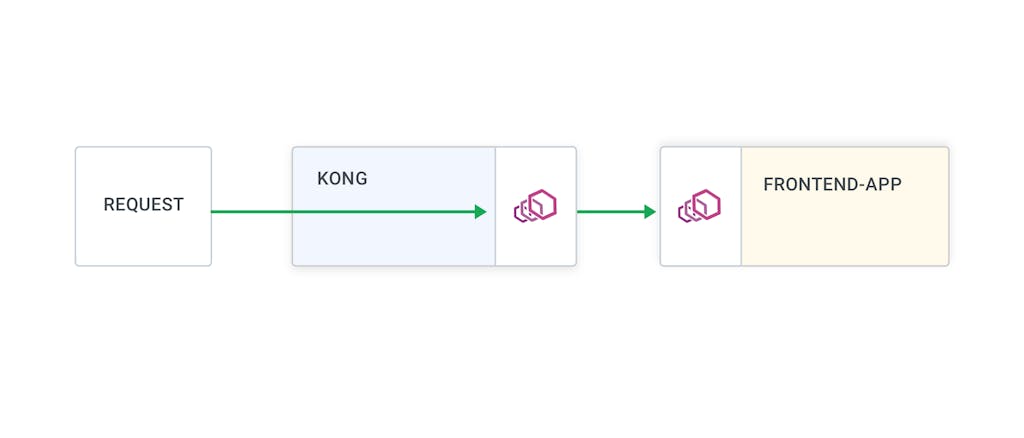
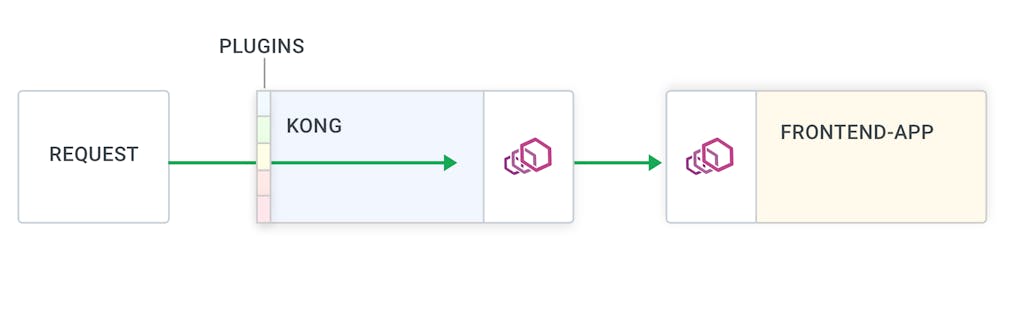
That's it! Now, if you visit the `$PROXY_IP`, you will land in the marketplace application proxied through Kong. From here, you can enable all those [fancy plugins](https://docs.konghq.com/hub)fancy plugins that Kong has to offer to work alongside the Kuma policies.
At first glance, that does not make sense, right? The title suggests you should invest your DevOps/Platform team’s time in introducing a new product that most likely will:
increase the complexity of your platform
increase resource usage
in
Kuma is configurable through policies. These enable users to configure their service mesh with retries, timeouts, observability, and more.
Policies contain three main pieces of information:
Which proxies are being configured
What traffic for t
Charly Molter
# Debugging Applications in Production with Service Mesh
As an application developer, have you ever had to troubleshoot an issue that only happens in production? Bugs can occur when your application gets released into the wild, and they can be extremely difficult to debug when you cannot reproduce without
Introduction One of the most common questions I get asked is around the relationship between Kong Gateway and Kuma or Kong Mesh . The linking between these two sets of products is a huge part of the unique “magic” Kong brings to the connectivit
The more services you have running across different clouds and Kubernetes clusters, the harder it is to ensure that you have a central place to collect service mesh observability metrics. That's one of the reasons we created Kuma , an open source
Kuma is an open source, CNCF service mesh that supports every environment, including Kubernetes and virtual machines. In this Kuma service mesh tutorial, I will show you how easy it is to get started. [iframe loading="lazy" width="890" height="56
Marco Palladino
# Kong Mesh 2.13: Mesh Identity Support for Universal Mode & LTS
Kong Mesh 2.13 delivers full support for Mesh Identity for Kubernetes and Universal mode. Plus, it's been designated as a Long Term Support release, with support for a total of 2 years. But first, what's Kong Mesh for the uninitiated? Built on top
Justin Davies
# Stop Wasting Your Engineers’ Time and Start Improving Your System Stability with Kuma
At first glance, that does not make sense, right? The title suggests you should invest your DevOps/Platform team’s time in introducing a new product that most likely will:
increase the complexity of your platform
increase resource usage
in
Kuma is configurable through policies. These enable users to configure their service mesh with retries, timeouts, observability, and more.
Policies contain three main pieces of information:
Which proxies are being configured
What traffic for t
Charly Molter
# Debugging Applications in Production with Service Mesh
As an application developer, have you ever had to troubleshoot an issue that only happens in production? Bugs can occur when your application gets released into the wild, and they can be extremely difficult to debug when you cannot reproduce without
Introduction One of the most common questions I get asked is around the relationship between Kong Gateway and Kuma or Kong Mesh . The linking between these two sets of products is a huge part of the unique “magic” Kong brings to the connectivit
The more services you have running across different clouds and Kubernetes clusters, the harder it is to ensure that you have a central place to collect service mesh observability metrics. That's one of the reasons we created Kuma , an open source
Kuma is an open source, CNCF service mesh that supports every environment, including Kubernetes and virtual machines. In this Kuma service mesh tutorial, I will show you how easy it is to get started. [iframe loading="lazy" width="890" height="56
Marco Palladino
# Kong Mesh 2.13: Mesh Identity Support for Universal Mode & LTS
Kong Mesh 2.13 delivers full support for Mesh Identity for Kubernetes and Universal mode. Plus, it's been designated as a Long Term Support release, with support for a total of 2 years. But first, what's Kong Mesh for the uninitiated? Built on top
Justin Davies
## Ready to see Kong in action?
Get a personalized walkthrough of Kong's platform tailored to your architecture, use cases, and scale requirements.