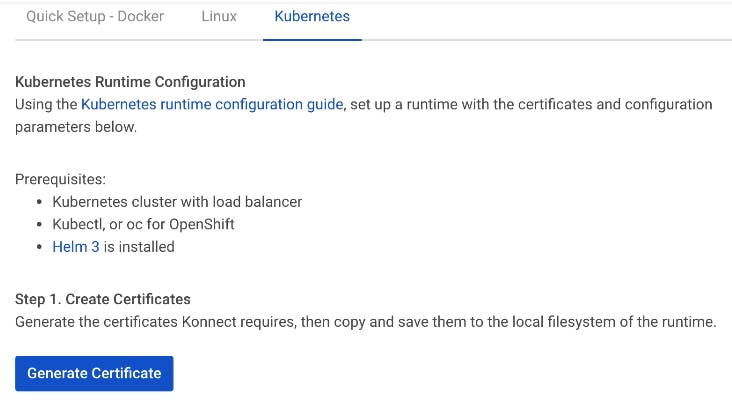
Next, we'll securely establish a connection between our control plane and our data plane. To do this, click **Generate Certificate** in the Runtimes section of Konnect.
You need to copy the certificate, root certificate and server private key to your files system.
We will deploy those to Kubernetes in a few steps.
$ helm install my-kong kong/kong -n kong \
   --values ./values.yaml
To get Helm access to Kong, we need to get the external IP address. For example, when creating a service with a load balancer in Google Cloud, Google Cloud will provide us with an external address. So to communicate with our application service, we need this address.
$ kubectl get service my-kong-kong-proxy -n kong
NAME TYPE CLUSTER-IP EXTERNAL-IP PORT(S) AGE
kong-proxy LoadBalancer 10.63.254.7835.233.198.1680:32697/TCP,443:32365/TCP 22h
Next, let's make sure we have a connection to this runtime in Konnect and K9s.
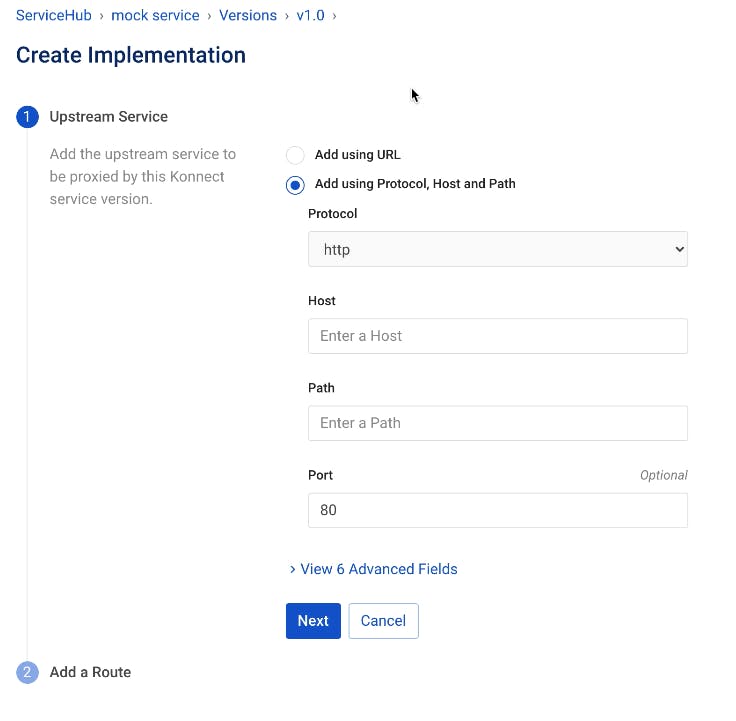
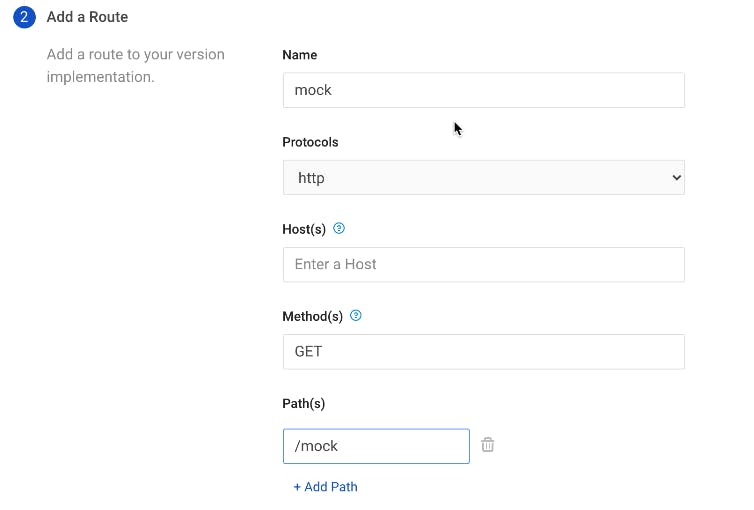
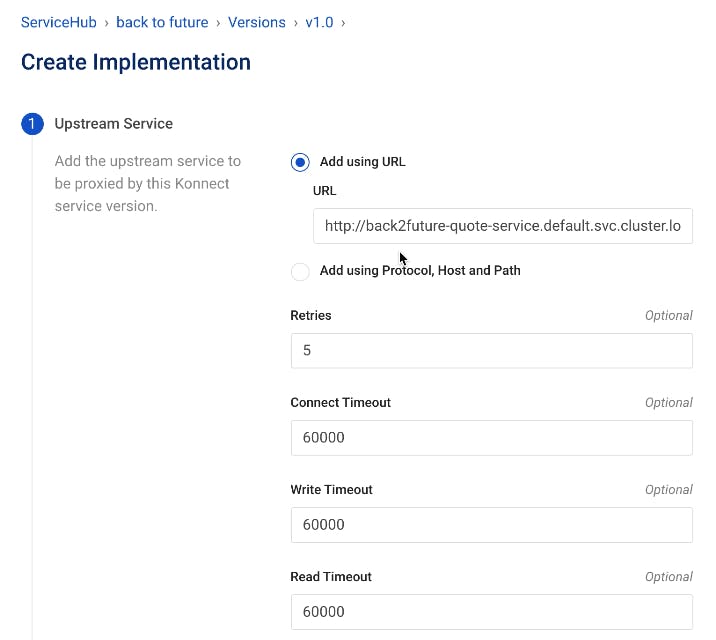
To create a new implementation, we'll go into our current version for the mock service and click **Add New Implementation**.
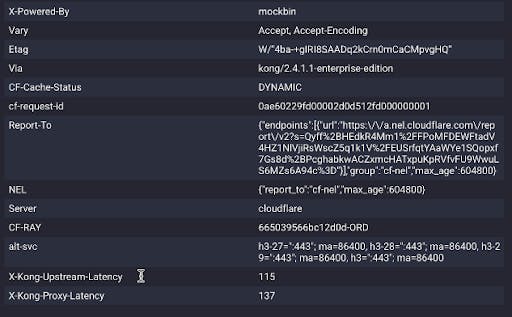
From Mockbin, we can try testing with foo and bar (http://mockbin.com/request?foo=bar&foo=baz), and I get the following response.
{"startedDateTime":"2021-06-28T21:26:17.519Z","clientIPAddress":"69.119.63.202","method":"GET","url":"http://mockbin.com/request?foo=bar&foo=baz","httpVersion":"HTTP/1.1","cookies":{},"headers":{"host":"mockbin.com","connection":"close","accept-encoding":"gzip","x-forwarded-for":"69.119.63.202, 172.70.110.190","cf-ray":"6669fe174b5317ad-EWR","x-forwarded-proto":"http","cf-visitor":"{\"scheme\":\"http\"}","upgrade-insecure-requests":"1","user-agent":"Mozilla/5.0 (Macintosh; Intel Mac OS X 10_15_7) AppleWebKit/537.36 (KHTML, like Gecko) Chrome/91.0.4472.114 Safari/537.36","accept":"text/html,application/xhtml+xml,application/xml;q=0.9,image/avif,image/webp,image/apng,*/*;q=0.8,application/signed-exchange;v=b3;q=0.9","accept-language":"en-US,en;q=0.9","cf-connecting-ip":"69.119.63.202","cdn-loop":"cloudflare","cf-request-id":"0af61d228a000017ad618f1000000001","x-request-id":"b665811b-5c7e-433a-9648-532aca7f22d1","x-forwarded-port":"80","via":"1.1 vegur","connect-time":"0","x-request-start":"1624915577517","total-route-time":"0"},"queryString":{"foo":["bar","baz"]},"postData":{"mimeType":"application/octet-stream","text":"","params":[]},"headersSize":859,"bodySize":0}
If we try to hit the same URL through Kong, we'll see some extra headers.
So far, in the Konnect UI, we configured a mock service. That configuration propagated into our data plane that deployed in Kubernetes. We didn’t configure anything in Kubernetes, but suddenly our Kong Gateway service running inside Kubernetes started understanding the mock URL.
## **Configure the Service in Kubernetes**
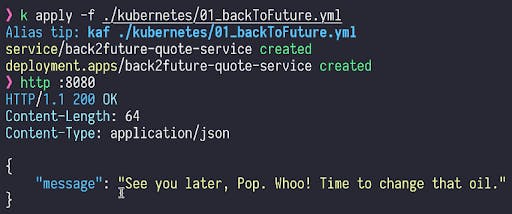
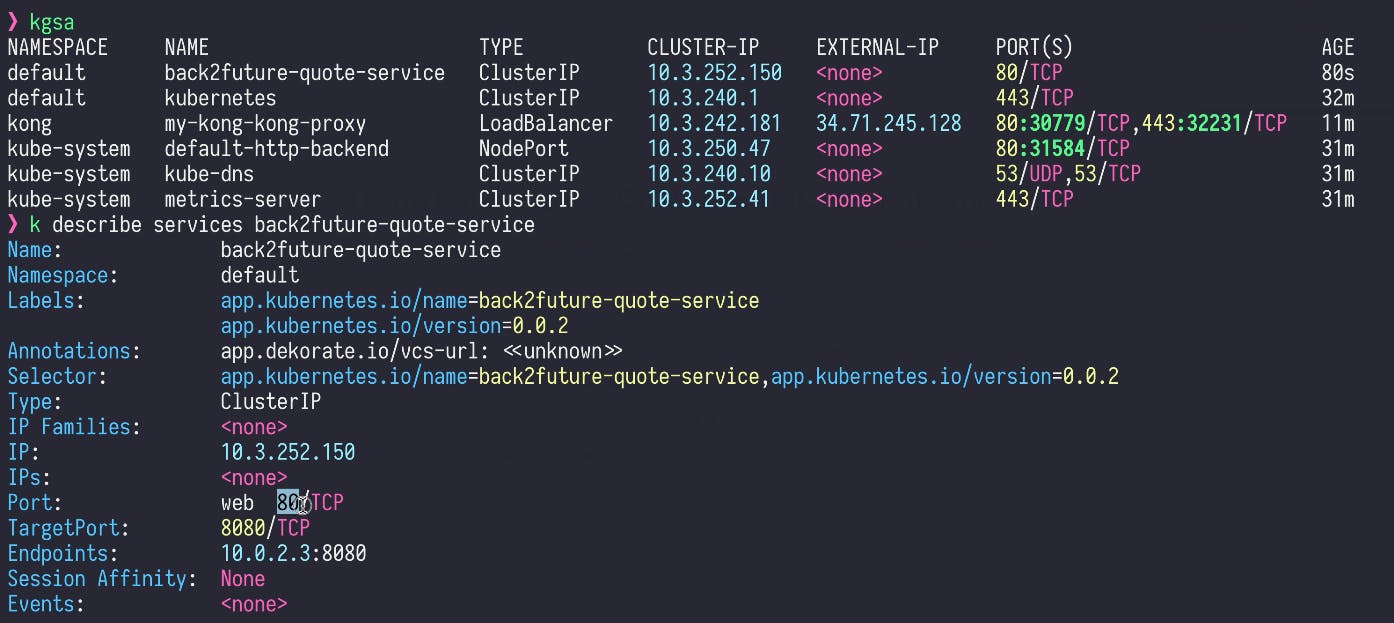
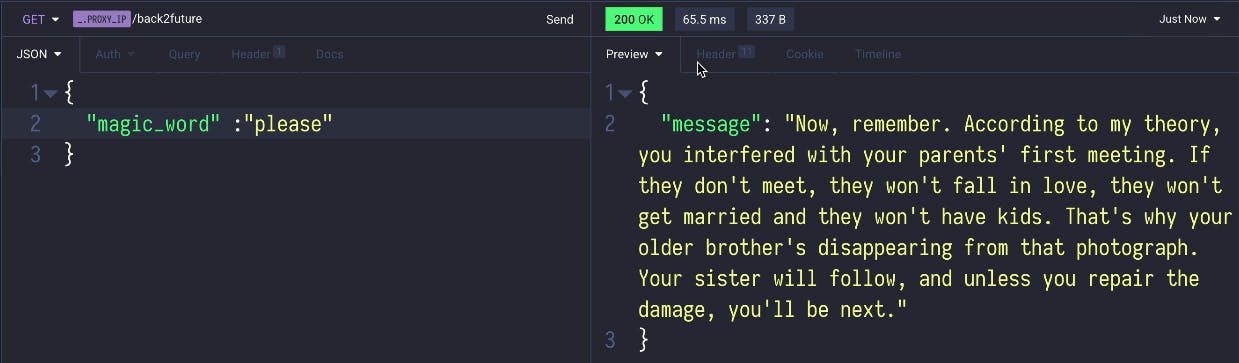
I wrote a small application called [Quote Service](https://github.com/gAmUssA/quotes-service)Quote Service that shows random quotes from Back to the Future. Once the application deploys, we’ll create the port forwarding. Then, once port forwarding is enabled, we’ll get responses from the service.
We'll hit this Kubernetes service through service discovery. So this Quote Service is now available on port 8080.
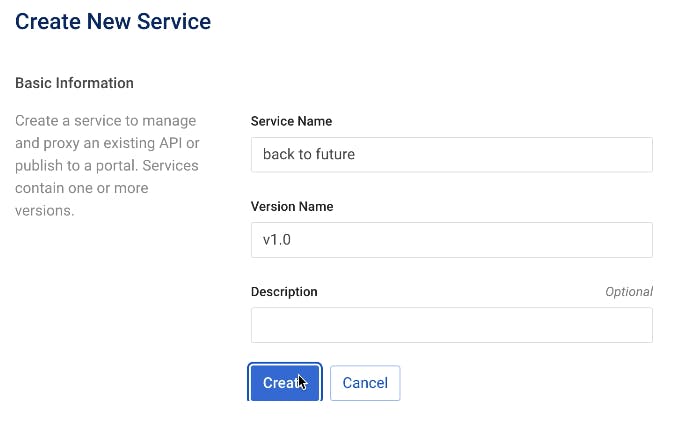
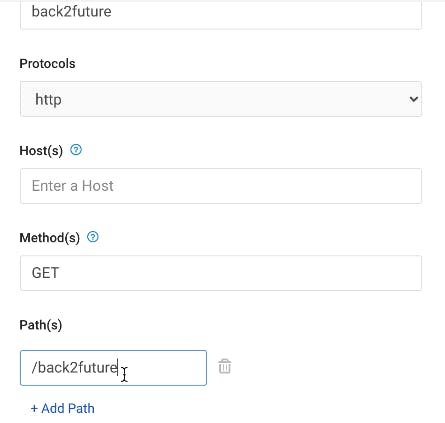
We'll go back to Konnect and create a new service and implementation again.
Built on top of Kong API Gateway, the Kong AI Gateway is designed to address key challenges in enterprise AI adoption. Modern AI applications rarely rely on a single model; instead, they orchestrate multiple GenAI providers, agent frameworks, Age
Anika Suri
# Farewell Ingress NGINX: Explore a Better Path Forward with Kong
"To prioritize the safety and security of the ecosystem, Kubernetes SIG Network and the Security Response Committee are announcing the upcoming retirement of Ingress NGINX . Best-effort maintenance will continue until March 2026. Afterward, there w
Justin Davies
# Insights into Kubernetes Deployments with Kong Ingress Controller
This blog addresses the common challenges organizations face with fragmented API management in Kubernetes environments and presents Kong Konnect combined with the Kong Ingress Controller (KIC) as a comprehensive solution. We'll highlight the issues
Declan Keane
# How We Built It: Managing Konnect Entities from K8s Clusters with KGO
We recently released Kong Gateway Operator 1.4 with support for managing Konnect entities from within the Kubernetes clusters. This means users can now manage their Konnect configurations declaratively, through Kubernetes resources powered by Kong
Patryk Małek
# Announcing the Kong Konnect Mesh EKS Blueprint Add-on
Zero to Hero on Amazon EKS with Konnect’s Mesh Manager
We’re excited to announce a new addition to our Kong Konnect EKS Blueprint Family: the Kong Konnect Mesh EKS Blueprint Add-on to deploy your Mesh Zones. Deploy your zones securely on AWS with
Danny Freese
# Rapid Application Modernization With Kong Konnect and Apache Camel (Part 1)
Here's a story about a developer surviving in a world of APIs, Kubernetes and rapid application modernization. Meet Josh (a pseudonym). Josh is your typical developer. He's good at writing code in his native language, hates documentation and REALL
Containerization and orchestration are becoming increasingly popular. According to a recent survey conducted by Market Watch, the global container market will exceed $5 billion by 2026. In 2019, that number was under 1 billion. These statistics sh
Michael Heap
# A Unified Gateway for APIs + Agentic Applications on VMware VKS with Kong Konnect
Built on top of Kong API Gateway, the Kong AI Gateway is designed to address key challenges in enterprise AI adoption. Modern AI applications rarely rely on a single model; instead, they orchestrate multiple GenAI providers, agent frameworks, Age
Anika Suri
# Farewell Ingress NGINX: Explore a Better Path Forward with Kong
"To prioritize the safety and security of the ecosystem, Kubernetes SIG Network and the Security Response Committee are announcing the upcoming retirement of Ingress NGINX . Best-effort maintenance will continue until March 2026. Afterward, there w
Justin Davies
# Insights into Kubernetes Deployments with Kong Ingress Controller
This blog addresses the common challenges organizations face with fragmented API management in Kubernetes environments and presents Kong Konnect combined with the Kong Ingress Controller (KIC) as a comprehensive solution. We'll highlight the issues
Declan Keane
# How We Built It: Managing Konnect Entities from K8s Clusters with KGO
We recently released Kong Gateway Operator 1.4 with support for managing Konnect entities from within the Kubernetes clusters. This means users can now manage their Konnect configurations declaratively, through Kubernetes resources powered by Kong
Patryk Małek
# Announcing the Kong Konnect Mesh EKS Blueprint Add-on
Zero to Hero on Amazon EKS with Konnect’s Mesh Manager
We’re excited to announce a new addition to our Kong Konnect EKS Blueprint Family: the Kong Konnect Mesh EKS Blueprint Add-on to deploy your Mesh Zones. Deploy your zones securely on AWS with
Danny Freese
# Rapid Application Modernization With Kong Konnect and Apache Camel (Part 1)
Here's a story about a developer surviving in a world of APIs, Kubernetes and rapid application modernization. Meet Josh (a pseudonym). Josh is your typical developer. He's good at writing code in his native language, hates documentation and REALL
Containerization and orchestration are becoming increasingly popular. According to a recent survey conducted by Market Watch, the global container market will exceed $5 billion by 2026. In 2019, that number was under 1 billion. These statistics sh
Michael Heap
## Ready to see Kong in action?
Get a personalized walkthrough of Kong's platform tailored to your architecture, use cases, and scale requirements.