To test your API (outside of a CI/CD framework), you'll need a client which can make requests to the API. That's why we have [Insomnia](https://insomnia.rest)Insomnia, an open source client for interacting with APIs. This post and video will show off some of the highlights of using Insomnia as a GraphQL client. We'll build a tiny GraphQL server in Node.js, and then use Insomnia both to fetch and manipulate data on it.
For our example, we'll create an API that stores and retrieves a list of users, along with their addresses. The beginning of our schema looks like this:
type User { id: Int!
name: String!
email: String!
addresses:[Address]}type Address { street: String!
city: String!
country: String!
}
Create a file called schema.graphql, and paste the above lines into it.
To retrieve data from our schema, we need to define an entry point query. For example, our GraphQL query will look something like this:
query { getUser(id:1) { id
name
email
}}
In this case, we're grabbing a user based on its id, requesting the response to show us that user’s id, name and email.
Queries are also defined in the SDL; the query field belongs to a special reserved type called Query, the main entry point for fetching objects. Add this code to the bottom of your schema.graphql file:
type Query {
  getUser(id: Int!): User
}
We also want to add a method for updating information. In GraphQL, a query that changes data is called a *mutation*. For example, a mutation to add a user might look like this:
A schema defines the shape of the stored data and how to construct queries. However, establishing a schema to fit your data model is just one part of the GraphQL server. The other part interacts with data using [resolvers](https://graphql.org/learn/execution/#root-fields-resolvers)resolvers. A resolver is just a function that returns the underlying value of a field.
Let’s take a quick look at how our Node server implements resolvers. The intent is to solidify concepts around how resolvers operate in conjunction with schemas, so we won’t go into too much detail around data stores setup.
In the "real world," we might be fetching data through the database. For now, let’s just set up some dummy data. Create a file called server.js and paste these lines into it:
GraphQL resolvers amount to a JSON hash with the key as the name of the field to be retrieved and the value corresponding to a function that returns the data. Let’s start with a barebones example of the initial user lookup by id. Add the following code to the bottom of your server.js file:
This resolver takes two arguments: an object representing the parent (often unused in the initial root query) and a JSON object containing the arguments passed to your field. Not every field will have arguments. In this case, they will because we need to retrieve our user by their id.
## **Building the API Server**
We’ll now use [Express](https://expressjs.com)Express to set up a basic API server to provide users GraphQL access to our data. Let's use npm to install the packages our server needs:
npm i express express-graphql graphql @graphql-tools/schema
Along with the users and resolvers we’ve already added, the rest of our server.js file stands up the server and connects the resolvers with the schema. Add the following code to the bottom of the file:
const fs = require("fs");
const { makeExecutableSchema } = require("@graphql-tools/schema");
// grab the GraphQL type definitionslet typeDefs = fs.readFileSync("schema.graphql",{ encoding:"utf8", flag:"r",});
// connect schema with resolversconst schema = makeExecutableSchema({ typeDefs, resolvers });
const express = require("express");
const { graphqlHTTP } = require("express-graphql");
// make our /graphql endpoint where requests are sentconst app = express();
app.use(
"/graphql", graphqlHTTP({ schema: schema,})
);
app.listen(5000, () => console.log("Express is now live at localhost:5000"));
Run node server.js to boot up the server on port 5000. If you're the cautious type, you can issue a curl command right now to verify that data loads correctly:
curl -X POST http://localhost:5000/graphql \-H 'Content-Type: application/graphql' \
-d 'query { getUser(id:1) { id name email }}'
The response should be data that corresponds to Francis!
## **Working With Insomnia GraphQL**
Working with curl is acceptable, but it can be cumbersome and limiting. Let's take a look at what Insomnia GraphQL offers.
### Basic GraphQL Queries and Mutations
From within the Insomnia dashboard, create a new collection for this project.
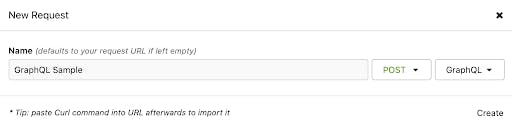
From your starting collection screen, click on **New Request**. Set the HTTP verb to POST and the body to GraphQL. You can also set a name if you desire (here, we chose "GraphQL Sample"). Then, click **Create**.
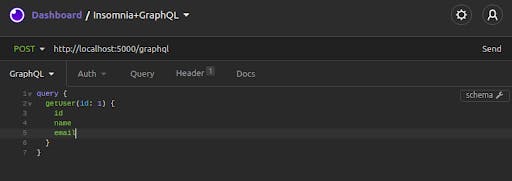
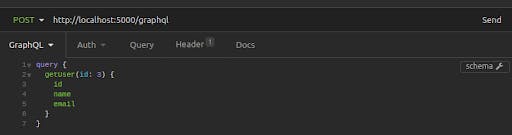
Set the URL for your request to your server’s endpoint. Then, copy-paste the query we used earlier into the editor for the GraphQL request body:
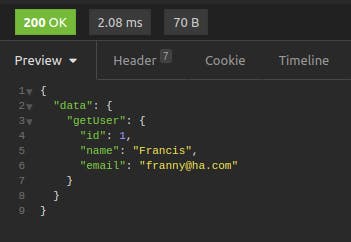
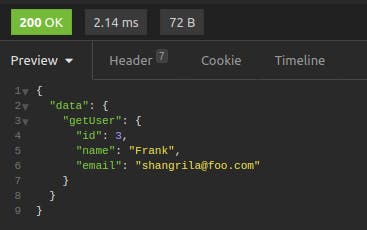
Click on "Send." You'll get Francis' data back in an easy-to-read, color-coded format.
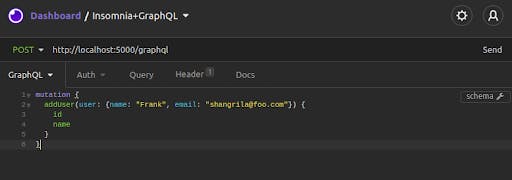
Let's try making a mutation next. Paste the following lines into the request body:
mutation { addUser(user:{name:"Frank", email:"shangrila@foo.com"}) { id
name
}}
In Insomnia, your request will look like this:
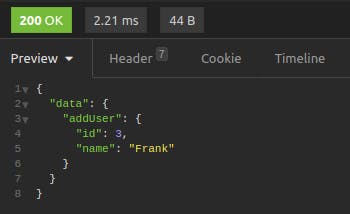
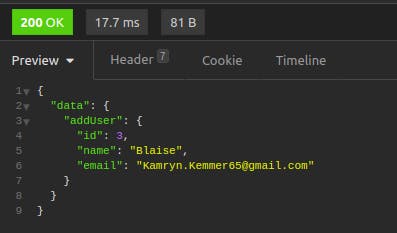
Click on "Send." The result shows the newly added record.
For an additional verification that the mutation went through, you can take the returned id (in this case, 3) and perform another getUser query.
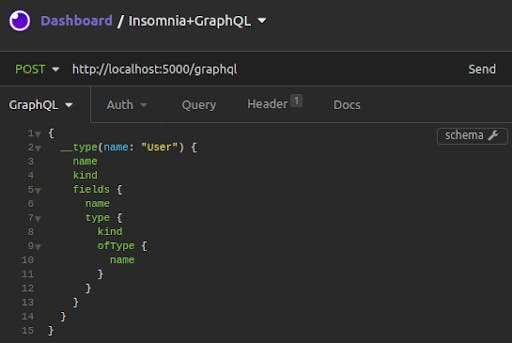
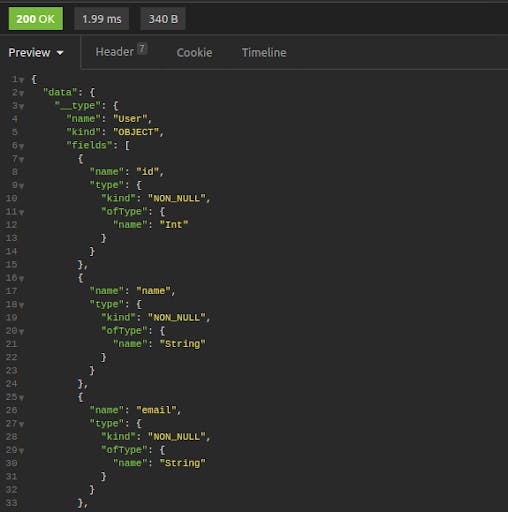
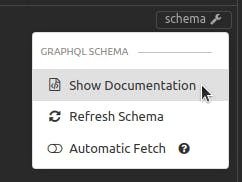
In addition, Insomnia GraphQL can fetch the schema from the server, allowing you to "show documentation:"
The result is an interactive listing where you can drill down through available queries and mutations, seeing object fields and inputs.
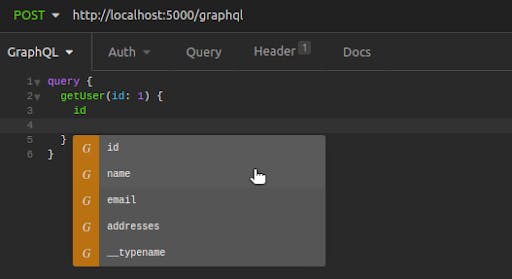
## Auto-Complete and Suggested Fields
After Insomnia has fetched a schema, future queries and mutations you write have the added help of auto-complete. Query names, required inputs and fields for retrieval are all made available as you type or by pressing cmd/ctrl + space bar.
These features make it easy to issue GraphQL queries and identify areas to improve your server performance.
## **Getting More Information on Insomnia GraphQL**
Perhaps the greatest strength of Insomnia is the fact that [it's completely open source](https://github.com/Kong/insomnia)it's completely open source! A large community of developers and backend engineers regularly use and contribute to the project. Insomnia also works for REST and gRPC APIs, providing the same measuring and reporting tools no matter how your server communicates.
Have you ever…. Copied an API spec out of Kong Konnect, or where you manage your APIs, pasted it into your API client, and immediately wondered if it’s the latest version? Sent an email to your platform team with the subject line “ which endpoint sh
Haley Giuliano
# How to Test Gateway APIs Directly from Kong Konnect with Insomnia
What You'll Build
To explore the new integration, I'll build a realistic API platform workflow using Konnect, Kong Gateway, and Insomnia.
By the end of this tutorial, I'll have:
A Konnect Control Plane (KongAir Dev)
A local Kong Gateway Data Pl
Domain-driven designs are popular in organizations that have complex domain models and wish to organize engineering around them. REST-based architectures are a common choice for implementing the API entry point into these domains. REST-based solu
Insomnia is a fast and lightweight open source desktop application that doubles as a tool for API design and testing and as an API client for making HTTP requests. It has built-in support for REST Client , gRPC and GraphQL . All of that is just
As more companies invest in a cloud native infrastructure , they're choosing to prioritize their applications as microservices —architecting them into distinct servers. Each component is responsible for one (and only one) feature. For example, yo
As the software application world moves from monolith architectures to microservices , we are also seeing a shift toward developing modular and reusable APIs. According to APIOps , reusable APIs are consumable APIs, which means they must be well-d
Viktor Gamov
# Enforce API Standards with Custom Linting in Kong Insomnia 13
To follow along, you’ll need: Insomnia 13 or later An Insomnia project with an API design document An OpenAPI 3.x specification Note: In Insomnia 13, custom linting supports Spectral rulesets using the top-level rules and extends properties. Custom
Juhi Singh
# Insomnia 13: Native Kong Konnect Integration for Real-Time API Testing
Have you ever…. Copied an API spec out of Kong Konnect, or where you manage your APIs, pasted it into your API client, and immediately wondered if it’s the latest version? Sent an email to your platform team with the subject line “ which endpoint sh
Haley Giuliano
# How to Test Gateway APIs Directly from Kong Konnect with Insomnia
What You'll Build
To explore the new integration, I'll build a realistic API platform workflow using Konnect, Kong Gateway, and Insomnia.
By the end of this tutorial, I'll have:
A Konnect Control Plane (KongAir Dev)
A local Kong Gateway Data Pl
Domain-driven designs are popular in organizations that have complex domain models and wish to organize engineering around them. REST-based architectures are a common choice for implementing the API entry point into these domains. REST-based solu
Insomnia is a fast and lightweight open source desktop application that doubles as a tool for API design and testing and as an API client for making HTTP requests. It has built-in support for REST Client , gRPC and GraphQL . All of that is just
As more companies invest in a cloud native infrastructure , they're choosing to prioritize their applications as microservices —architecting them into distinct servers. Each component is responsible for one (and only one) feature. For example, yo
As the software application world moves from monolith architectures to microservices , we are also seeing a shift toward developing modular and reusable APIs. According to APIOps , reusable APIs are consumable APIs, which means they must be well-d
Viktor Gamov
# Enforce API Standards with Custom Linting in Kong Insomnia 13
To follow along, you’ll need: Insomnia 13 or later An Insomnia project with an API design document An OpenAPI 3.x specification Note: In Insomnia 13, custom linting supports Spectral rulesets using the top-level rules and extends properties. Custom
Juhi Singh
## Ready to see Kong in action?
Get a personalized walkthrough of Kong's platform tailored to your architecture, use cases, and scale requirements.