You know you need a secure front door to your system. If requests don’t have the right credentials, the door should remain locked. If they do have the proper credentials, the entry should be smooth.
But how do you verify that credentials are authentic? And how do you make sure there aren't other ways for those without the right credentials to get into your system?
Let’s walk through those scenarios as I demonstrate how to secure a service (in this case, an API server) with [Kong Gateway](https://konghq.com/kong/?itm_source=website&itm_medium=nav)Kong Gateway and its JWT plugin. I'll cover all the steps to set up, configure and test the service — giving you the foundational knowledge needed to implement these tools independently.
A JWT has a data payload *signed* by a trusted party to prevent spoofing. An authorizer verifies that the JWT token is authentic, allowing (or forbidding) access to that resource. Typically, a JWT payload is *not* encrypted; it’s open for the whole world to read. However, what's critical is the *authenticity* of a token, which depends on a trusted party signing it.[](https://konghq.com/conferences/kong-summit)
## **What Does Kong's JWT API Gateway Plugin Do? **
In this approach, the plugin serves as the JWT authorizer. It authenticates the JWT in the HTTP request by verifying that token’s claims and ensuring a trusted party signed it. Then, depending on whether these steps were successful, Kong Gateway routes the upstream service request.
Keep in mind that *authentication* in this context means validating the user’s credentials. That's the job of the JWT plugin. There’s no way to know *how* a user got a valid JWT. The system just knows that the user has one and is presenting it for authentication. If the JWT is authentic, you can be confident that the user is who they say.
In this basic use case, I have a login server that accepts login attempts with a user's email and password. If the email/password checks out, the server generates and signs a JWT and hands it back to the user.
With JWT in hand, the user tries to access our microservice: a simple API server with a single endpoint. Kong Gateway sits in front of your API server, using the JWT plugin for authentication. The user presents his JWT with his request.
First, the plugin verifies the token's authenticity. Next, it confirms the installation steps of the claims inside the payload. A common claim used is an expiration timestamp for the access token. It's essentially saying, "This token is valid until this date and time.*"* So, the plugin will check the token’s expiration date.
If the JWT passes all the necessary checks, Kong Gateway grants access to the requested server endpoint. Otherwise, it responds with 401 Unauthorized.
The approach to JWT authentication is quite simple:
- Set up a basic Node.js Express server with a single endpoint.
- Set up Kong Gateway as an API gateway to your server.
- Enable the JWT plugin to protect your server endpoint with JWT authentication.
Lastly, I'll cover advanced use cases for the plugin. Ready to dive in to our JWT Authentication Tutorial? Here we go!
### **1. Set Up a Node.js Express Server and Endpoint**
On your local machine, create a folder for your project. Then, initialize a new Node.js project. In the following examples, I'll use yarn, but you could use npm too:
~$ mkdir project
~$ cd project
~/project$ yarn init  # Use all of the yarn defaults here.
Next, add Express to your project:
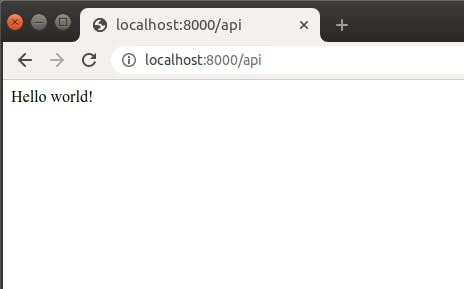
You can use your browser to test this new endpoint by visiting http://localhost:3000.
Your API server endpoint should be working now!
Next, use [Insomnia](https://insomnia.rest)Insomnia to send the request and inspect the response. Because of its usability, you're going to want to use Insomnia exclusively once you start sending requests with a JWT.
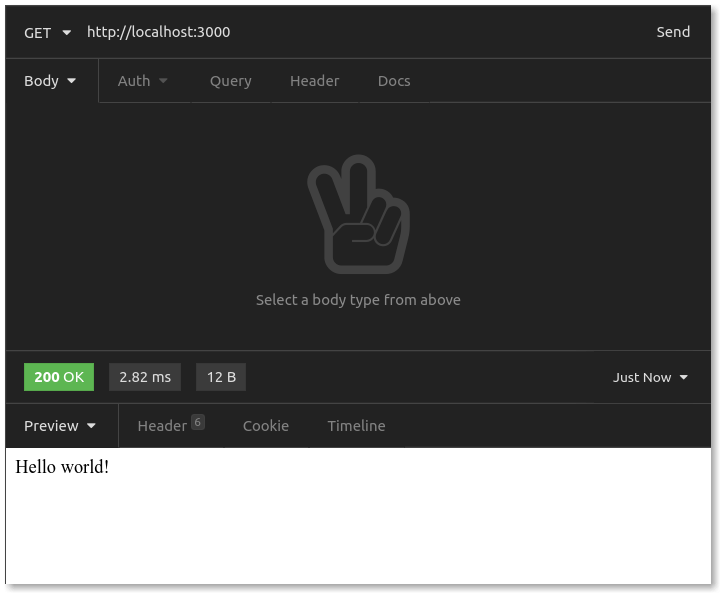
In Insomnia, create a GET request to http://localhost:3000. Here's the response:
In Insomnia, you should get a 200 OK with "Hello world!" in the response body.
It looks like the API server is up and running. Now, it's time to put Kong Gateway in front of it.
Once you’ve installed Kong, you'll need to take a few additional steps.
#### **DB-Less Declarative Configuration**
For the simple setup example, I'll use **database-less declarative configuration**. When you start up Kong, you'll tell it where to find a .yml file with all of the configuration declared within.
Next, define routes, which "determine how (and if) requests are sent to their Services after they reach Kong Gateway." The (local) URL for Kong is http://localhost:8000. You should declare your route so that Kong listens for requests at http://localhost:8000/api, then routes to your service.
Let's see this in action. Make sure your Express server is running in a separate terminal. Then, start Kong.
~/project$ sudo kong start
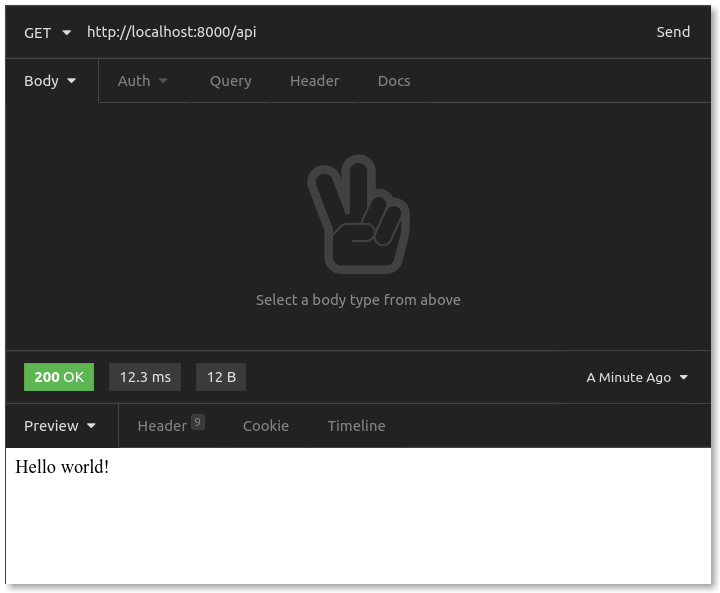
In your browser, go to http://localhost:8000/api:
Kong Gateway is up. Finally, add authentication.
### **3. Attach JWT Plugin to Kong Gateway**
To add the JWT plugin, add a “plugins” definition to your kong.yml file:
The response is 401 Unauthorized. Excellent! Kong now requires a valid JWT for any requests to your API server. Next, you need to tell Kong what constitutes a valid JWT.
In kong.yml, you need to add a consumer and a credential. Kong [describes consumers](https://docs.konghq.com/2.3.x/getting-started/adding-consumers)describes consumers as being "associated with individuals using your Service, and can be used for tracking, access management, and more." In a more elaborate setting, *every* one of your API users could be a consumer. That's a use case you can read more about towards the end of this article. In this situation, your login server is your consumer. Your login server will be the entity generating JWTs and handing them out. Users who make a request to Kong will be holding a "login server" JWT.
Edit your kong.yml file by adding the “consumers” and “jwt_secrets” definitions:
You've added a new consumer, named login_server_issuer. Then, you added a JWT API gateway credential for that consumer, which contains the secret used to sign JWTs for this consumer. Authentication requires two parts:
- The kid (key identifier) value in the JWT header, which is a unique identifier that lets the plugin determine *which* consumer allegedly issued this JWT
- Verification of the consumer’s secret - Was this the secret used to sign this JWT API gateway? If so, then this JWT is authentic.
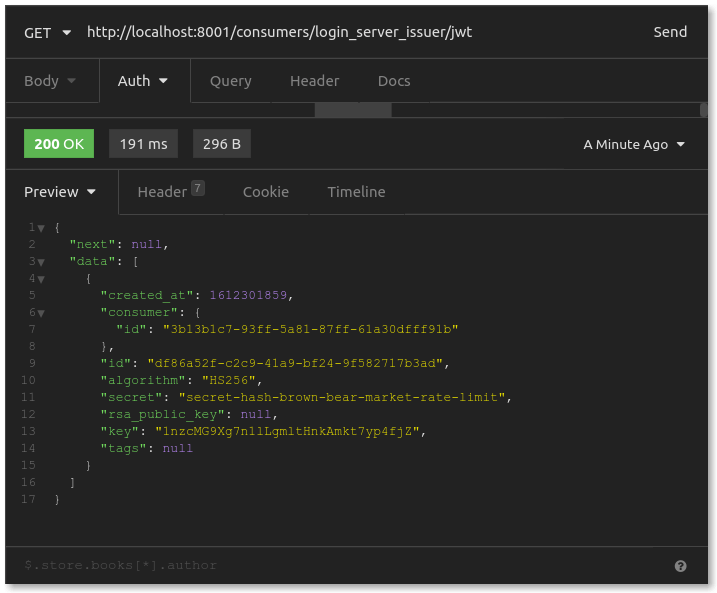
If you want to generate a JWT for testing, you need the secret (which you have) and the key to use for the kid value. Kong gives us access to that value through its admin API at http://localhost:8001. You send a GET request to the admin API's endpoint /consumers/CONSUMER-USERNAME/jwt. This gives us information about this consumer's JWT credential:
As you inspect this credential’s information, you should see the JWT secret and signing algorithm. What you’re looking for, though, is the key. In the above example, that's 1nzcMG9Xg7n1lLgmltHnkAmkt7yp4fjZ. **This** is what you use as the kid value in the JWT header. The Kong plugin will see this kid value, track down the associated consumer and secret, then make sure the JWT was signed with that secret.
To test this, let's start with the happy path. You need a JWT with a header that includes the correct kid value, signed with the right secret. For simplicity, let's do this at[ jwt.io](https://jwt.io) jwt.io. Here, you can craft your payload, set the signing secret and then copy/paste the resulting JWT.
In the payload, the kid must match the key value from above. Also, because you configured the plugin to check JWT token expiration, you should set the exp (Unix timestamp) far into the future. The name and email are inconsequential; they just demonstrate that you can put other helpful data in the JWT payload.
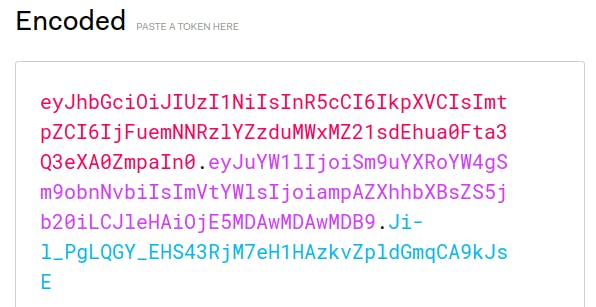
Lastly, include your JWT secret at the bottom for proper signing. The result is an encoded JWT.
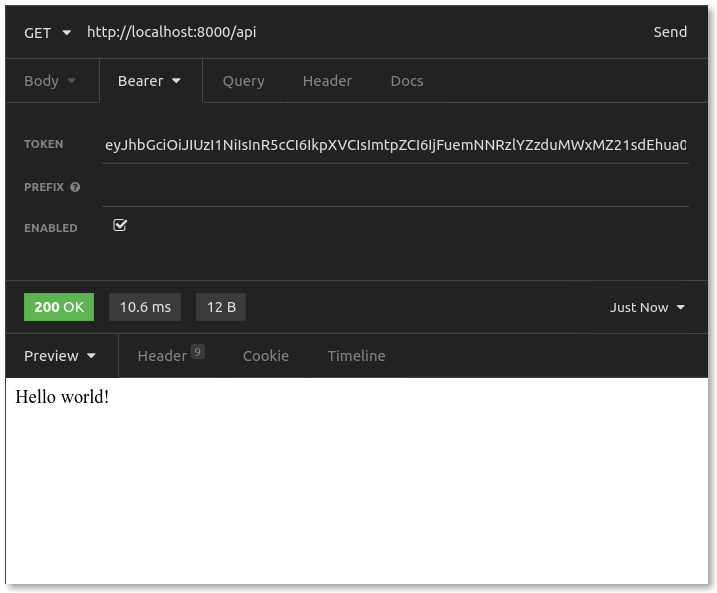
Back in Insomnia, you have your original request that resulted in 401. You need to add "Authorization" to that request. Choose "Auth – Bearer Token," then paste in your encoded JWT from above.
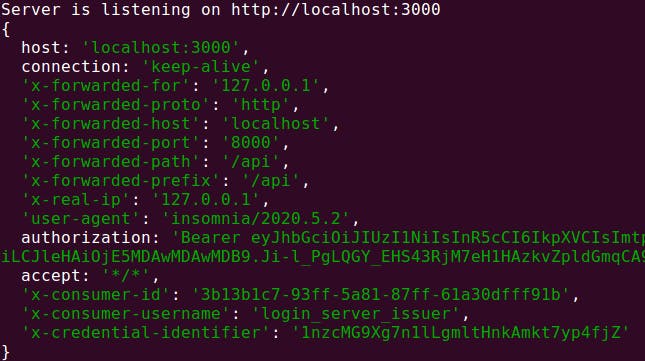
Now, with a valid JWT attached, resend the request.
Your JWT should have been validated, and Kong routed us to the API server!
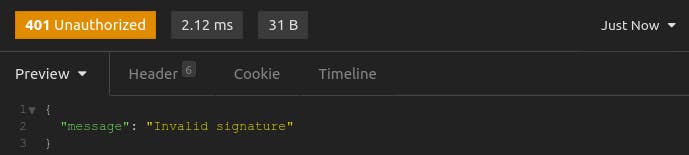
But what happens if your JWT is not valid? Let's test and see.
First, sign the JWT with a different secret. Back at [jwt.io](https://jwt.io)jwt.io, keep the payload, but change the signing secret. Copy the resulting JWT to Insomnia, and send your request again. You'll get a 401 with "Invalid Signature."
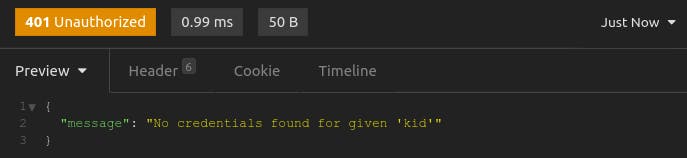
If your secret is correct, but the kid is incorrect, Kong won't find an associated credential. Without that credential, there’s no way to find the secret for authenticating the JWT.
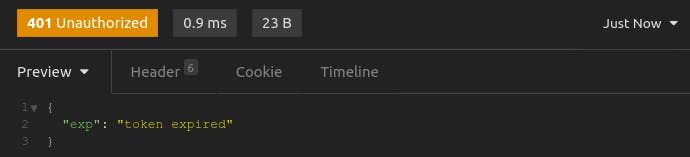
Lastly, if the exp value is in the past, then your JWT has expired. Just as you expected, you get the following response.
And that's it! You should be up and running with Kong Gateway and the JWT Plugin acting as an authentication layer in front of an API server.
From here, you should have the foundation needed to deal with more complex cases. Let's look at a few below.
## **Other Use Cases for Kong Gateway JWT Plugin**
### **Every User Is a Consumer**
Earlier, I illustrated a straightforward case where a login server acts as your service's sole consumer. Though that’s a standard model, you can also configure Kong to hook into your user database. You can tell Kong Gateway that *every* user in your database is a consumer, and they each have a unique JWT secret. Your login server could generate JWTs, but a user's successful login would result in a JWT signed with a secret that is *specific* to that individual user. This type of granular JWT issuing could allow for more precise tracking and access logging through Kong.
With this model, you could even let users (consumers) know what their kid and signing secret are, and your users could generate their own JWT to use whenever they want.
### **Authentication for Some Routes, but Not Others**
In this project, I enabled the JWT API gateway plugin on the api-requests routes. You can imagine a use case where Kong is configured with a single service (like an API server), but multiple routes are configured to hit different subsets of paths. For example, you might have a route for endpoints related to product inventory but another route for endpoints related to order history. Perhaps you could enable the JWT plugin on the order history route—which requires authentication—but not on the publicly accessible inventory counts route. With Kong, you can pick and choose which services or routes should get the JWT plugin and which shouldn't.
### **"Anonymous" Access**
The plugin also has an [anonymous consumer](https://docs.konghq.com/hub/kong-inc/jwt/#parameters)anonymous consumer option. With this option, Kong allows the user to anonymously access the upstream service if authentication *fails*. You can imagine an upstream service like a web application, where "anonymous" (not logged-in) users can still access parts of your application with limited privileges.
### **Public/Private Keys**
The common (and simpler) usage for generating a JWT is to sign it with a secure secret kept by the JWT issuer. You can configure the Kong plugin for[ generating a JWT with public/private keys](https://docs.konghq.com/hub/kong-inc/jwt/#craft-a-jwt-with-publicprivate-keys-rs256-or-es256) generating a JWT with public/private keys. In this model, the consumer maintains a pair of keys — one public and one private. The private API key is secure, while the public key is available to hand out. When configuring a consumer's JWT credentials for Kong, the system stores the public key with Kong instead of a secret. When generating a JWT, the consumer signs it with his or her *private key*. The JWT API gateway plugin uses the public key for this consumer to authenticate that the consumer signed the JWT.
## **Set It and Forget It**
Implementing authentication —and getting it right —is hard work. As microservices become the norm, delegating authentication makes more and more sense. "Rolling your own" implementation for JWT authentication can muddy a code base and still leave you wondering if you got it right. By using well-tested and community-adopted services that handle concerns like routing, logging or authentication, developers can shift their focus back to their projects' unique needs.
The JSON Web Token (JWT) is an open standard that allows information to be transferred securely between different parties. The token is digitally signed by using a private key (HMAC) or a public/private key (RSA) by building a JSON Web Signature (JW
This post is part of our Kong Champions series, where real Kong users walk you through technical challenges, use cases, and new technology they're using in their day-to-day. Sign up here to become a Kong Champion. As a Kong user, I've had the oppo
Samuele Chiocca
# Dynamic Routing Based on JWT Token’s Claim with Kong Konnect
A common use case that is frequently requested is how to dynamically route requests based on authentication attributes. An example of this technique is routing requests to relevant upstream services based on claims contained in a JWT token. Admins w
Shlomi Tubul
# How OAuth2 Authorization Works: Kong API Gateway 4 Step Tutorial
In this tutorial, I'm going to walk through adding OAuth2 authorization and authentication to your service with the Kong API Gateway OAuth2 plugin . First, I'll cover the fundamentals. If you're already familiar with how Kong Gateway and OAuth2 wor
Aapo Talvensaari
# A Unified Gateway for APIs + Agentic Applications on VMware VKS with Kong Konnect
Built on top of Kong API Gateway, the Kong AI Gateway is designed to address key challenges in enterprise AI adoption. Modern AI applications rarely rely on a single model; instead, they orchestrate multiple GenAI providers, agent frameworks, Age
Anika Suri
# Building a Secure, Scalable AI Infrastructure with Kong and Akamai: A Technical Introduction
Together, the following components represent the three layers of the new AI platform: AI Gateway: Kong AI Gateway (including MCP support) controls both GenAI and MCP flow and orchestrates the existing services like Vector Databases, Event Streaming,
Marco Raffaelli
# Beyond Static Routing: Modernizing API Logic with Conditional Policy Execution
Imagine you have a single Service, order-api . You want to apply a strict rate limit to most traffic, but you want to bypass that limit—or apply a different one—if the request contains a specific X-App-Priority: High header. Previously, you had t
Hugo Guerrero
# How to Craft and Sign a Custom JWT in Kong Konnect
The JSON Web Token (JWT) is an open standard that allows information to be transferred securely between different parties. The token is digitally signed by using a private key (HMAC) or a public/private key (RSA) by building a JSON Web Signature (JW
This post is part of our Kong Champions series, where real Kong users walk you through technical challenges, use cases, and new technology they're using in their day-to-day. Sign up here to become a Kong Champion. As a Kong user, I've had the oppo
Samuele Chiocca
# Dynamic Routing Based on JWT Token’s Claim with Kong Konnect
A common use case that is frequently requested is how to dynamically route requests based on authentication attributes. An example of this technique is routing requests to relevant upstream services based on claims contained in a JWT token. Admins w
Shlomi Tubul
# How OAuth2 Authorization Works: Kong API Gateway 4 Step Tutorial
In this tutorial, I'm going to walk through adding OAuth2 authorization and authentication to your service with the Kong API Gateway OAuth2 plugin . First, I'll cover the fundamentals. If you're already familiar with how Kong Gateway and OAuth2 wor
Aapo Talvensaari
# A Unified Gateway for APIs + Agentic Applications on VMware VKS with Kong Konnect
Built on top of Kong API Gateway, the Kong AI Gateway is designed to address key challenges in enterprise AI adoption. Modern AI applications rarely rely on a single model; instead, they orchestrate multiple GenAI providers, agent frameworks, Age
Anika Suri
# Building a Secure, Scalable AI Infrastructure with Kong and Akamai: A Technical Introduction
Together, the following components represent the three layers of the new AI platform: AI Gateway: Kong AI Gateway (including MCP support) controls both GenAI and MCP flow and orchestrates the existing services like Vector Databases, Event Streaming,
Marco Raffaelli
# Beyond Static Routing: Modernizing API Logic with Conditional Policy Execution
Imagine you have a single Service, order-api . You want to apply a strict rate limit to most traffic, but you want to bypass that limit—or apply a different one—if the request contains a specific X-App-Priority: High header. Previously, you had t
Hugo Guerrero
## Ready to see Kong in action?
Get a personalized walkthrough of Kong's platform tailored to your architecture, use cases, and scale requirements.