Here's the thing about AI APIs: talking about monetization strategy is one thing. Actually building it is another.
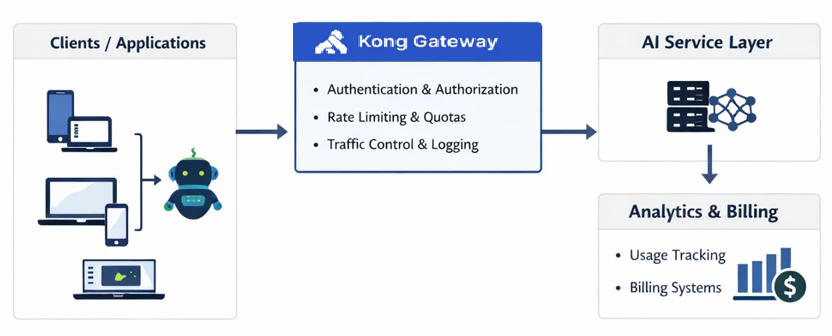
In production, there are three capabilities that aren't optional. You need secure access — because an API without authentication isn't a product, it's an open door. You need usage tier enforcement — because pricing tiers that can't be enforced technically aren't tiers, they're just labels. And you need real visibility into usage — because without measurement, you're making pricing, capacity, and abuse decisions in the dark.
Most teams know they need all three. Far fewer have actually wired them together in a way that can withstand real-world pressure.
That's exactly what this lab is about. We're going to build this out end-to-end — not as a toy example, but in a setup that mirrors how this actually gets done in production. By the time we're done, you'll have stood up secure access, wired in tier-based enforcement, and connected the whole thing to metrics and monitoring that give you genuine visibility into what's happening on your system.
Let's get into it.
**Step 1: Start Kong Gateway**
We’ll deploy **Kong** using Docker with PostgreSQL.
*docker network create kong-net*

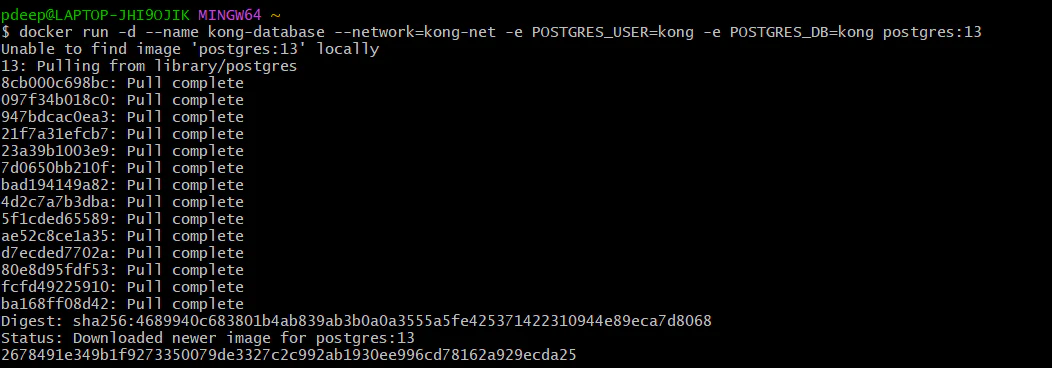
**Step 2: Run PostgreSQL for Kong:**
**Note: **Before running this, ensure you have successfully created the kong-net network in Step 1 so the database and gateway can communicate.
*docker run -d --name kong-database --network=kong-net -e POSTGRES_USER=kong -e POSTGRES_PASSWORD=kong -e POSTGRES_DB=kong postgres:13*
**Step 3: Run Kong Migrations*** *
*docker run --rm --network=kong-net -e KONG_DATABASE=postgres -e KONG_PG_HOST=kong-database kong:latest kong migrations bootstrap*
Wait until you see the database up.
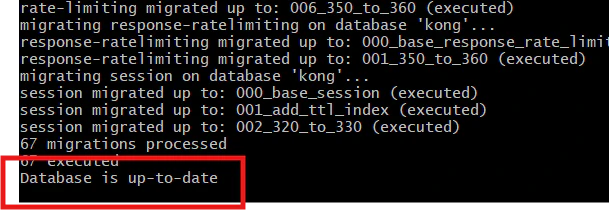
Now, our migration is successful.
**Step 4: Start Kong Gateway**
*docker run -d --name kong --network=kong-net -e KONG_DATABASE=postgres -e KONG_PG_HOST=kong-database -e KONG_PG_PASSWORD=kong -e KONG_ADMIN_LISTEN=0.0.0.0:8001 -p 8000:8000 -p 8001:8001 kong:latest*

**Step 5: Test Kong Gateway**
*curl http://localhost:8001*
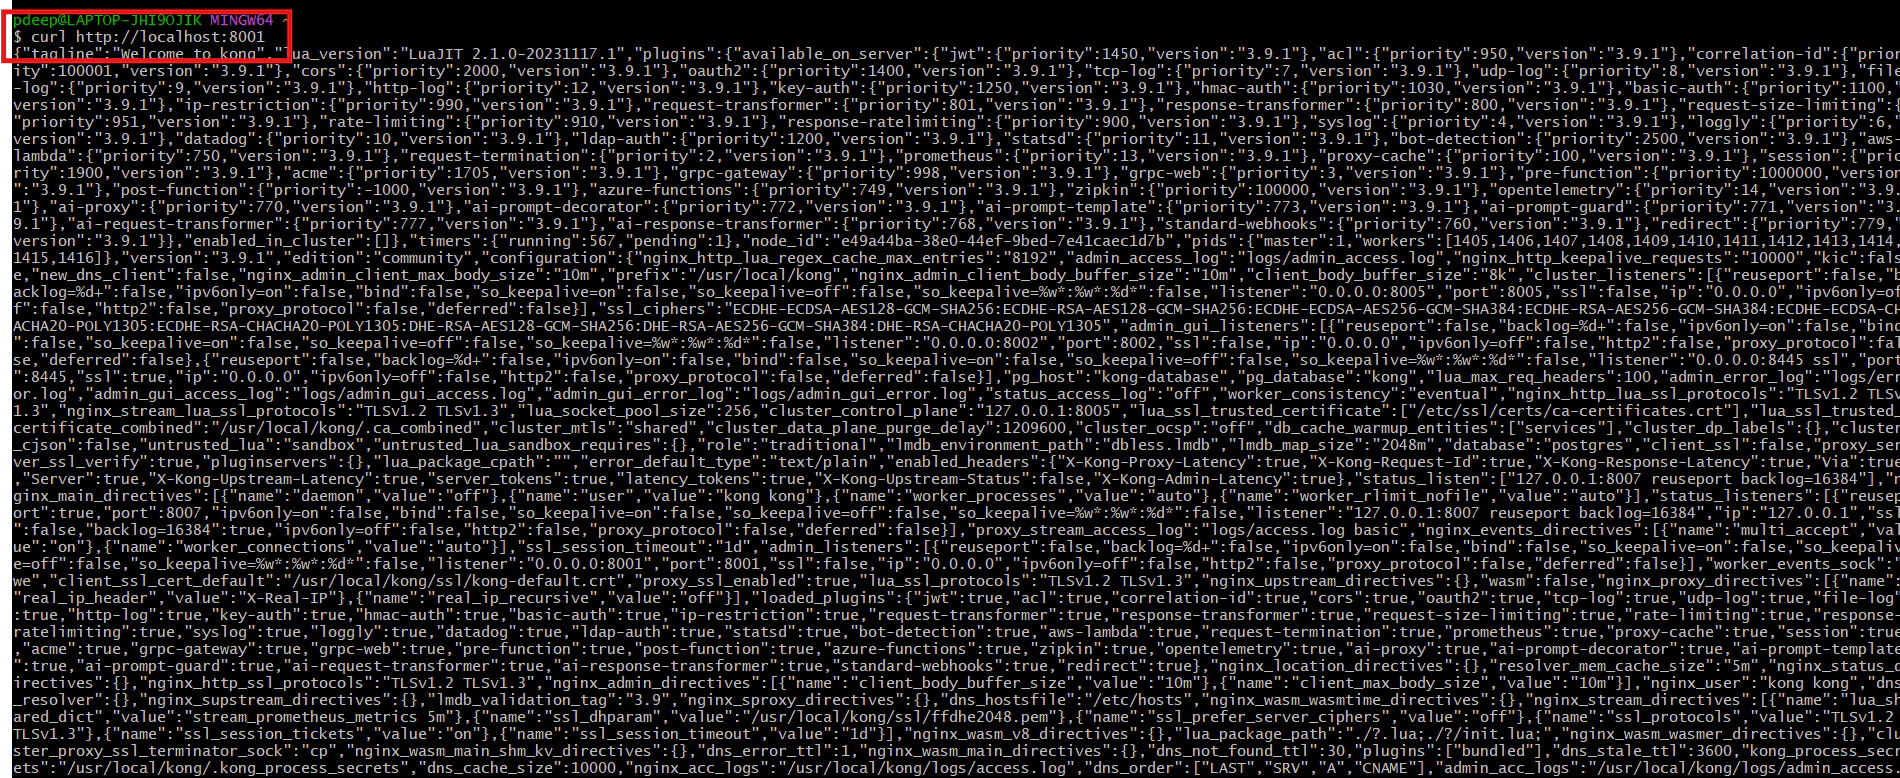
We are now running Kong Gateway with PostgreSQL in proper production mode.
**Step 6: Create your AI backend service**
Right now, **Kong** is running, but it’s not routing anything yet. Let’s add your backend.
**Run Mock AI Service**
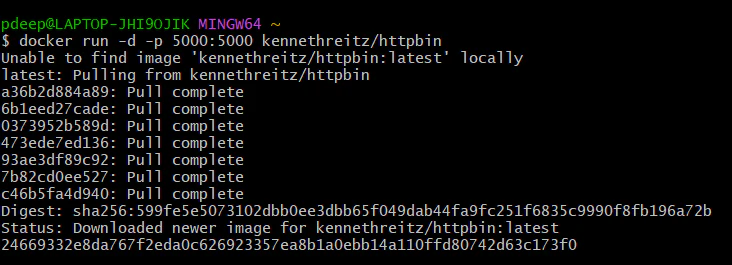
**To keep this lab simple and focused on the gateway, we are using kennethreitz/httpbin as a lightweight proxy to simulate a real LLM or AI endpoint.**
*docker run -d -p 5000:5000 kennethreitz/httpbin*
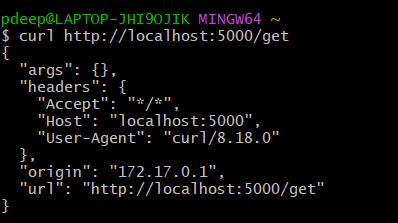
**Step 7: Do a curl using the below command. If you see JSON – backend is ready.**
*curl http://localhost:5000/get*
**Now connect backend to Kong**
**Step 1: Create service in Kong**
*curl -X POST http://localhost:8001/services -d "name=ai-service" -d "url=http://host.docker.internal:5000"*

You should get JSON response showing service created.
**Step 2: Create route in Kong**

Our Route is also created
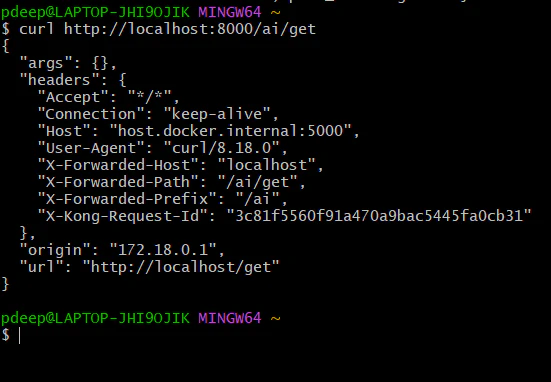
**Step 3: Test through Kong proxy**
*curl *[_*http://localhost:8000/ai/get*_](http://localhost:8000/ai/get)_*http://localhost:8000/ai/get*_

If everything is correct, you will again see JSON – But now the request is flowing:
Client -> **Kong** -> Http bin -> back to client
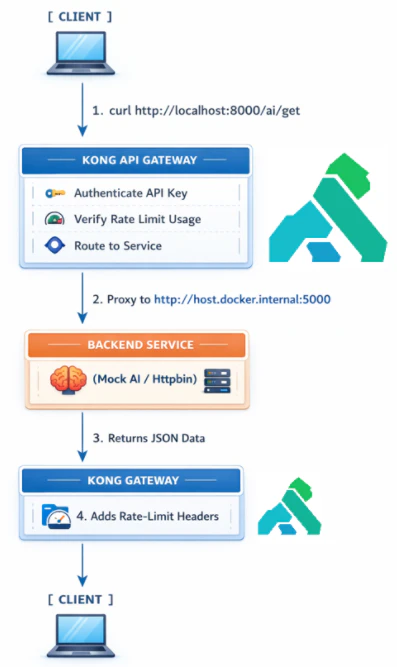
This means **Kong** routing is working.
Right now, everyone can access [_http://localhost:8000/ai/get_](http://localhost:8000/ai/get)_http://localhost:8000/ai/get_ . We will secure it.
**Next step: Add security (API Key Authentication)**
**Step 1: Enable key authentication plugin**
*curl -X POST http://localhost:8001/services/ai-service/plugins \*
** ***-d "name=key-auth"*

You should get JSON response confirming the plugin is enabled.
**Step 2: Test without key (should fail)**
*curl http://localhost:8000/ai/get*
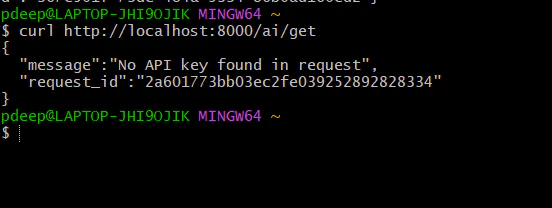
You should see: 401 unauthorized. “No API Key found in the request”. That means security is working.
**Step 3: Create consumer (user)**
**Create a consumer:**
*curl -X POST http://localhost:8001/consumers \*
* -d "username=deepanshu"*

**Step 4: Generate API Key**
*curl -X POST http://localhost:8001/consumers/deepanshu/key-auth*

It will return response in JSON and API Key will be present.
**Step 5: Call API With Key**
*curl http://localhost:8000/ai/get \*
* -H "apikey: W0D2dEpFfchHrM4iyqRqMaxJ4GihcBDX"*
Now it should work again
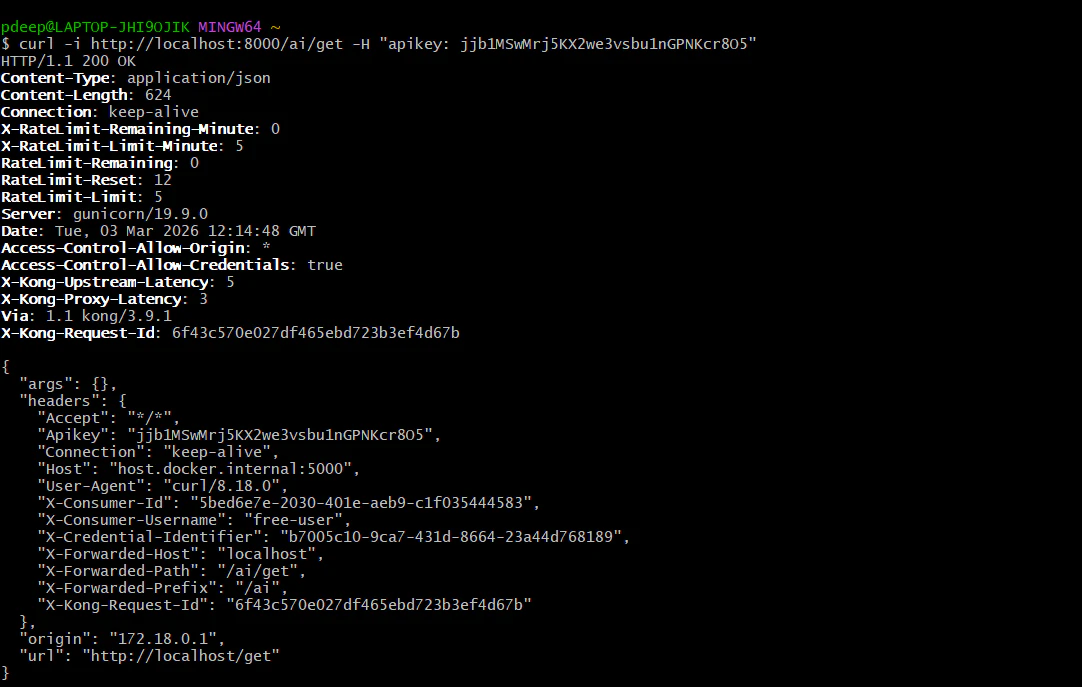
These headers confirm everything is working perfectly:
NEXT STEP: Add Rate Limiting (Monetization Layer)
Now we turn this into:
Free Plan: 10 request/min
Pro Plan: 100 request/min
**Step 1: Add rate limiting to service**
**Let’s start simple (per consumer).**
*curl -X POST http://localhost:8001/services/ai-service/plugins \*
* -d "name=rate-limiting" \*
* -d "config.minute=5" \*
* -d "config.policy=local"*

This means – 5 requests per minute per consumer.
**Step 2: Test it**
Run this 6–7 times quickly:
*curl http://localhost:8000/ai/get \*
* -H "apikey: W0D2dEpFfchHrM4iyqRqMaxJ4GihcBDX"*
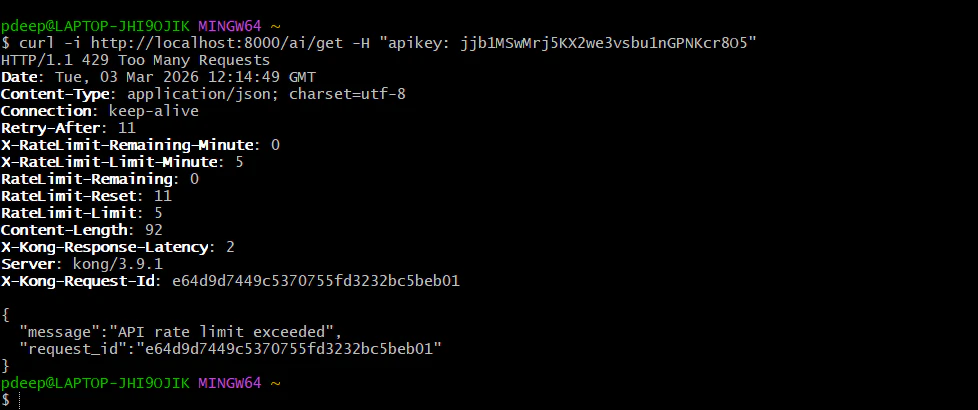
After 5 requests, you should see: “**API rate limit exceeded**”.

That’s your **monetization** control.
**Next Level (Professional Setup)**
**Step 1: Create free vs pro plans (real monetization model)**
Right now, rate limit applies to everyone equally.
We’ll separate users.
**Create free user**
*curl -X POST http://localhost:8001/consumers \*
* -d "username=free-user"*

You should see in the JSON, our free-user is created.
**Generate key:**
*curl -X POST http://localhost:8001/consumers/free-user/key-auth*

The JSON shows API Key is generated for free-user.
**Add rate limit only for free-user:**
*curl -X POST http://localhost:8001/consumers/free-user/plugins \*
* -d "name=rate-limiting" \*
* -d "config.minute=5" \*
* -d "config.policy=local"*

The JSON response shows we have applied rate limit for the free-user.
**Create Pro User**
*curl -X POST http://localhost:8001/consumers \*
*-d "username=pro-user"*

You should see in the JSON, our free-user is created.
**Generate key:**
*curl -X POST http://localhost:8001/consumers/pro-user/key-auth*

The JSON shows API Key is generated for pro-user.
**Add higher rate limit:**
*curl -X POST http://localhost:8001/consumers/pro-user/plugins \*
* -d "name=rate-limiting" \*
* -d "config.minute=100" \*
* -d "config.policy=local"*

**Now:**
**Free → 5/min**
**Pro → 100/min**
That’s real SaaS tiering.
**Test the free tier (Limit: 5 per minute)**
Run this command 6 times quickly:
*curl -i http://localhost:8000/ai/get -H "apikey: jjb1MSwMrj5KX2we3vsbu1nGPNKcr8O5"*
**Requests 1-5**: You should see HTTP/1.1 200 OK.
**Request 6**: You should see HTTP/1.1 429 Too Many Requests with the message: "API rate limit exceeded".
Test the Pro tier (Limit: 100 per minute)
Even if your free user is blocked, your pro user should still work perfectly:
*curl -i http://localhost:8000/ai/get -H "apikey: wsbAKYRrUPu2LEQ70BKH6fpTJvpBz3mz"*
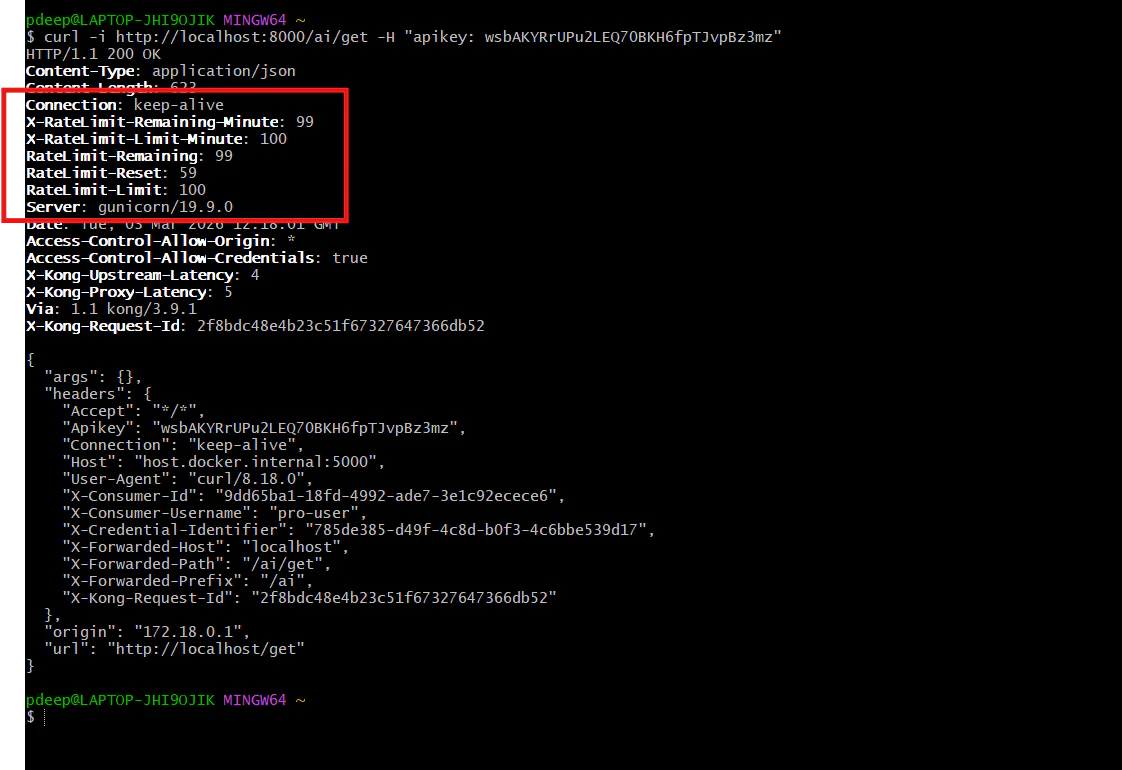
Check the headers in the response; you will see X-RateLimit-Limit-Minute: 100. This user has a much larger "bucket."
**Summary of results by following these steps **
You have successfully moved from a wide-open API to a secured, tiered monetization model. You can now distinguish between "Free" and "Pro" traffic and enforce different financial and technical limits at the edge.